Lisp Gamedev Course: Guide
Learn Lisp and game programming as one thing. Start at the top and work down, or jump to whatever phase you're ready for, Track B is designed to be jumped into anytime after Phase 1.
- Phase 0: First Contact
- Phase 1: Foundations
- Phase 2: Arcade Classics
- Phase 3: Same Game, Three Lisps
- Phase 4: Systems & Architecture
- Phase 5: Realistic Capstones
- Track B: Web Games (parallel, jump in anytime after Phase 1)
- Demo gallery (every game you build, running)
- Where to go next
Where this material comes from
Curated from eight sibling repos across five Lisp dialects, see the README for the full list and links.
Demo gallery
Every game the course has you build, running from this repo's own exercises/ code on its own vendored raylib engine. Nothing here is borrowed from the sibling raylib suites: these are the programs you end up with if you work through the lessons.
Every GIF is committed. Maintainers regenerate them with bb record, which drives screen-grab from scripts/demo_manifest.edn — that file also holds the per-game capture settings and input timelines.
🎈 Phase 1 — Foundations
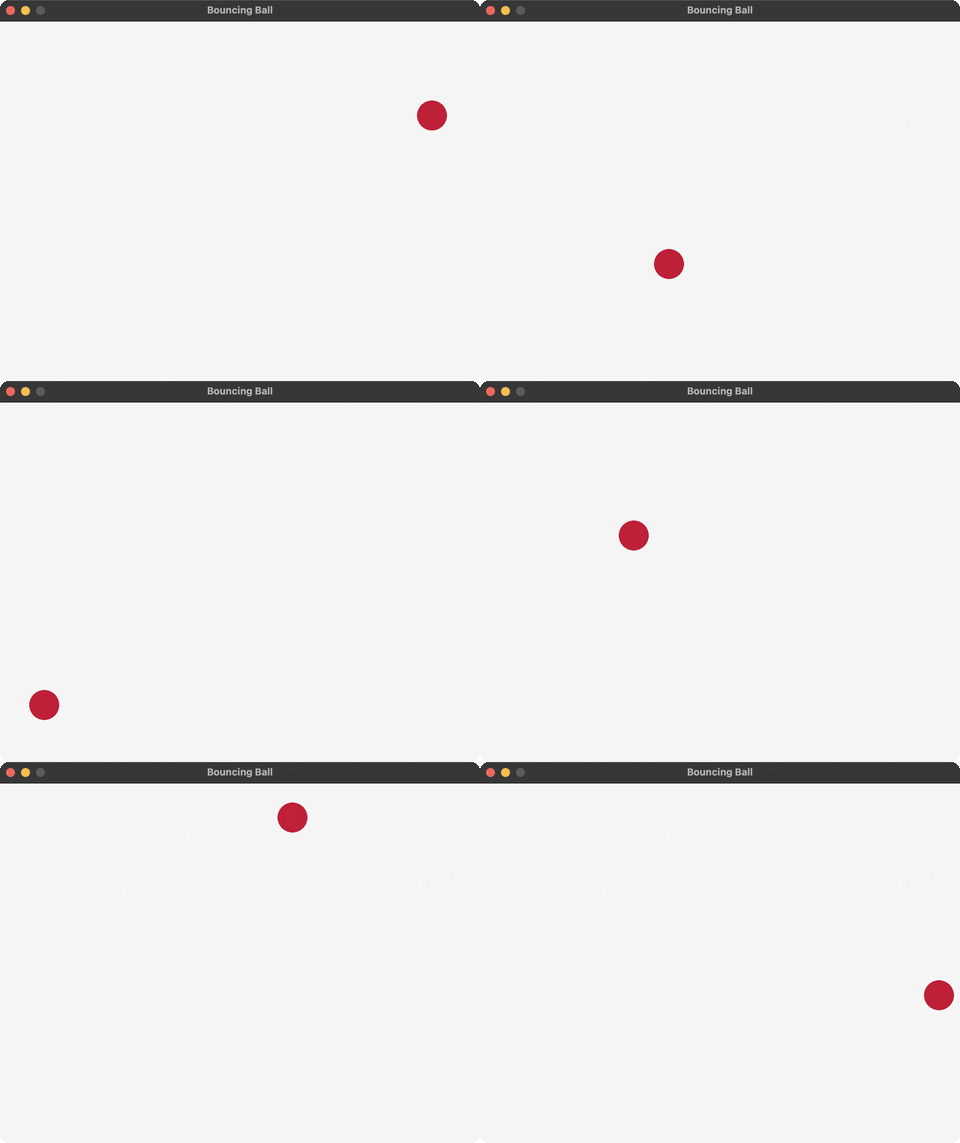
Bouncing ball
The first thing that moves: one ball, one velocity vector, walls that flip its sign. Lesson
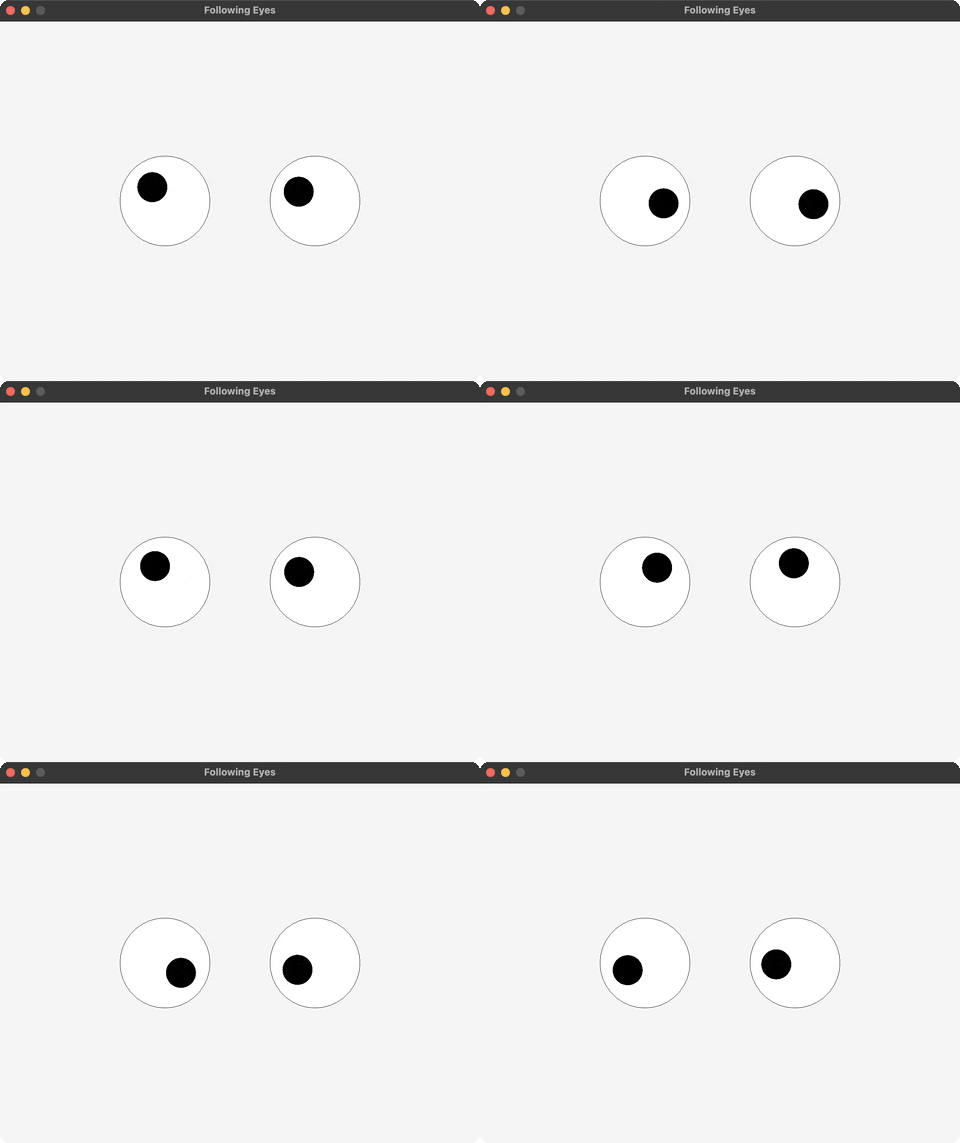
Following eyes
Reading input every frame — two eyes that track the real mouse cursor. Lesson
🕹️ Phase 2 — Arcade Classics
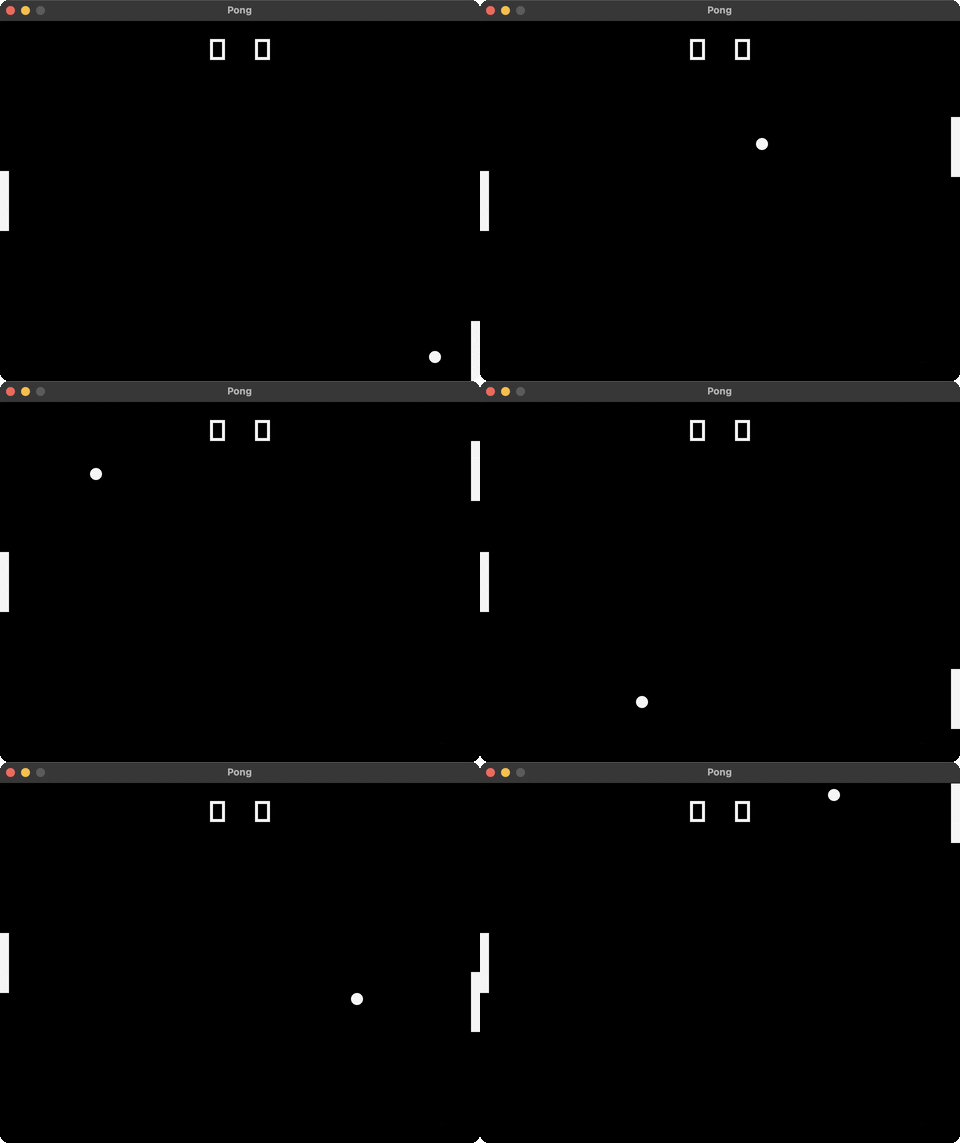
Lesson 1 — Pong
W/S move your paddle, the right one is a tracking AI. Lesson
Lesson 2 — Breakout
A brick grid as data, cleared one collision at a time. Lesson
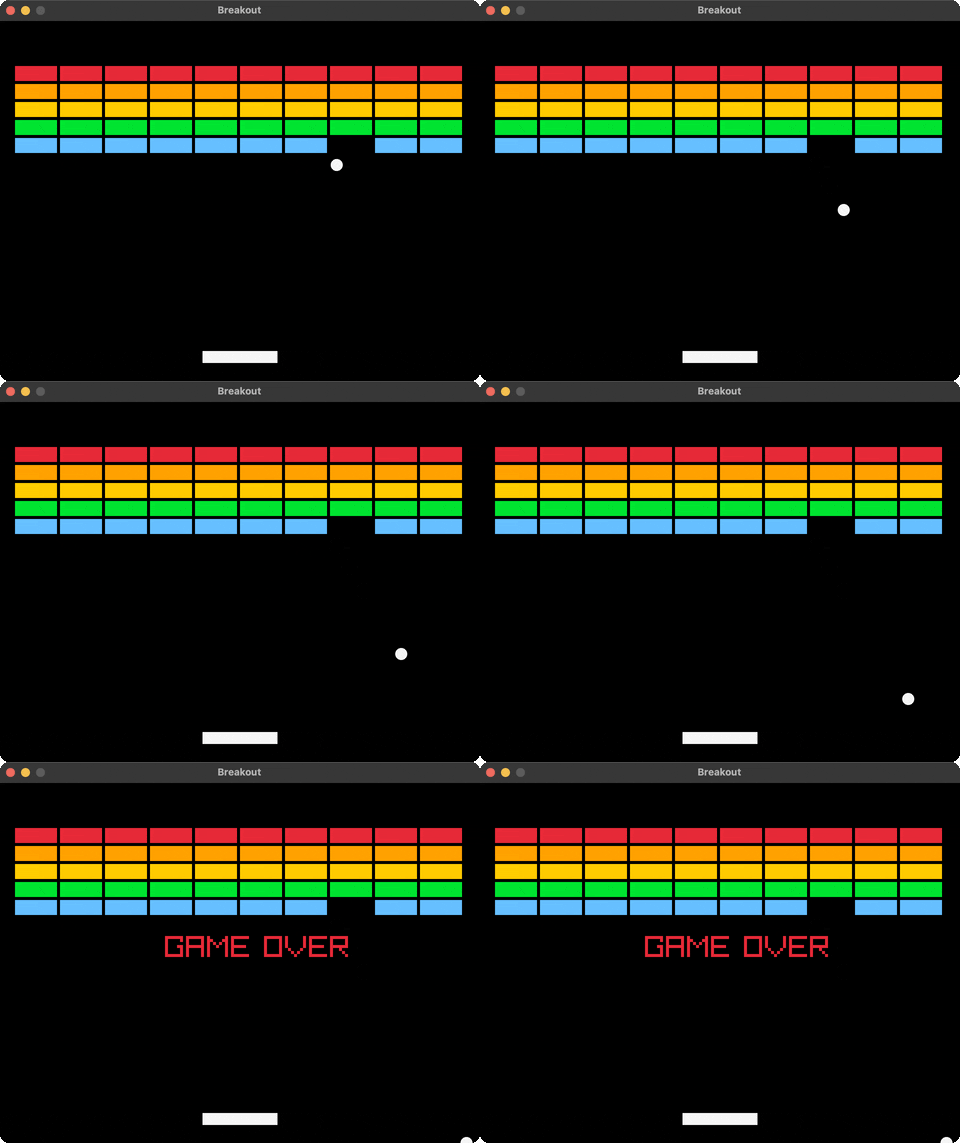
Short on purpose. Breakout's paddle reads a held key, which the capture tool cannot synthesise — it can only tap — so the recorded ball always gets past the paddle. The clip loops on the fall rather than sitting on a frozen board. Played by hand it rallies fine.
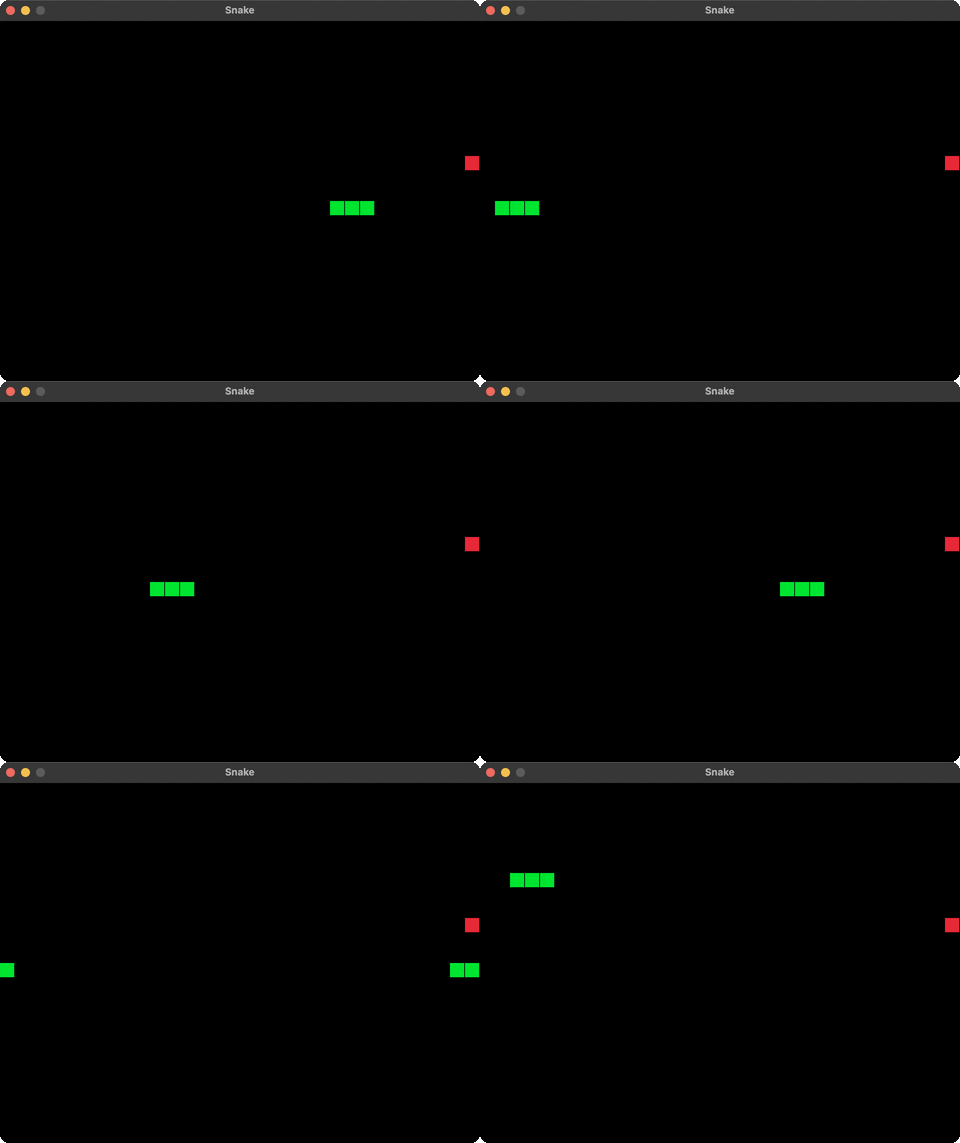
Lesson 3 — Snake
The whole snake is a vector of cells; growing is a conj. Lesson
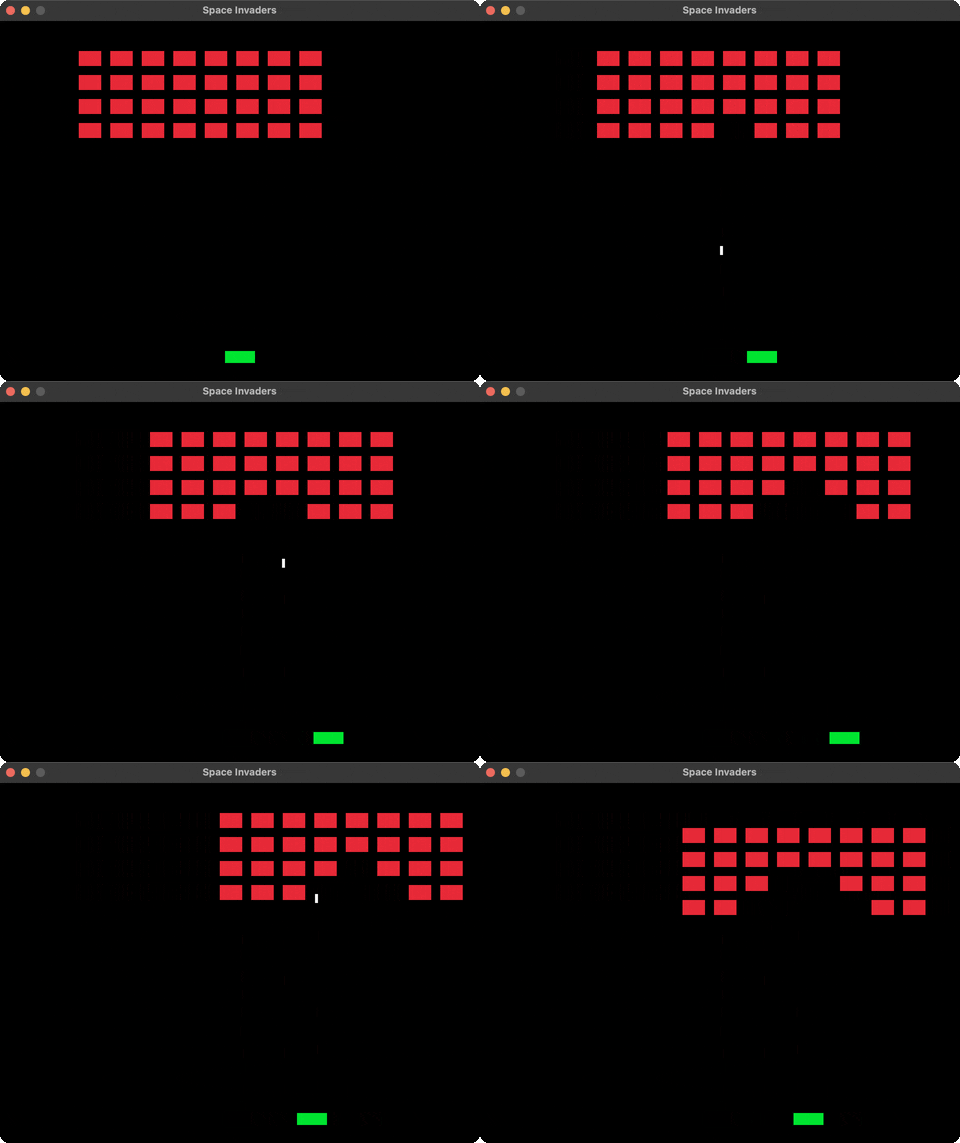
Lesson 4 — Space Invaders
A marching enemy formation, one bullet in flight at a time. Lesson
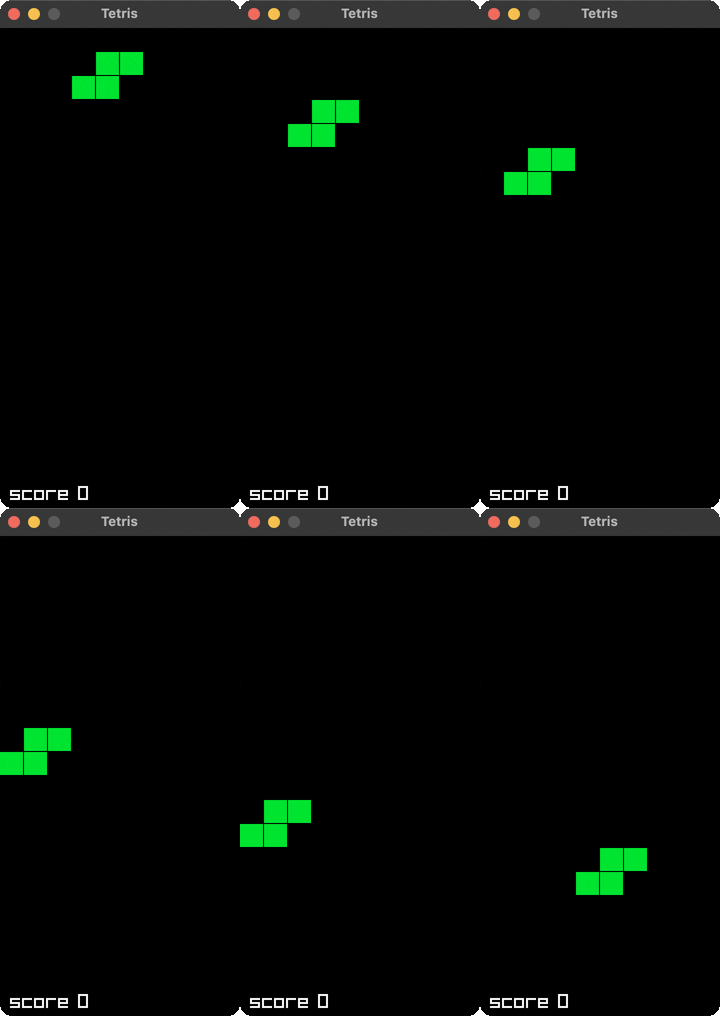
Lesson 5 — Tetris
Pieces as offset vectors, rotation as a coordinate transform. Lesson
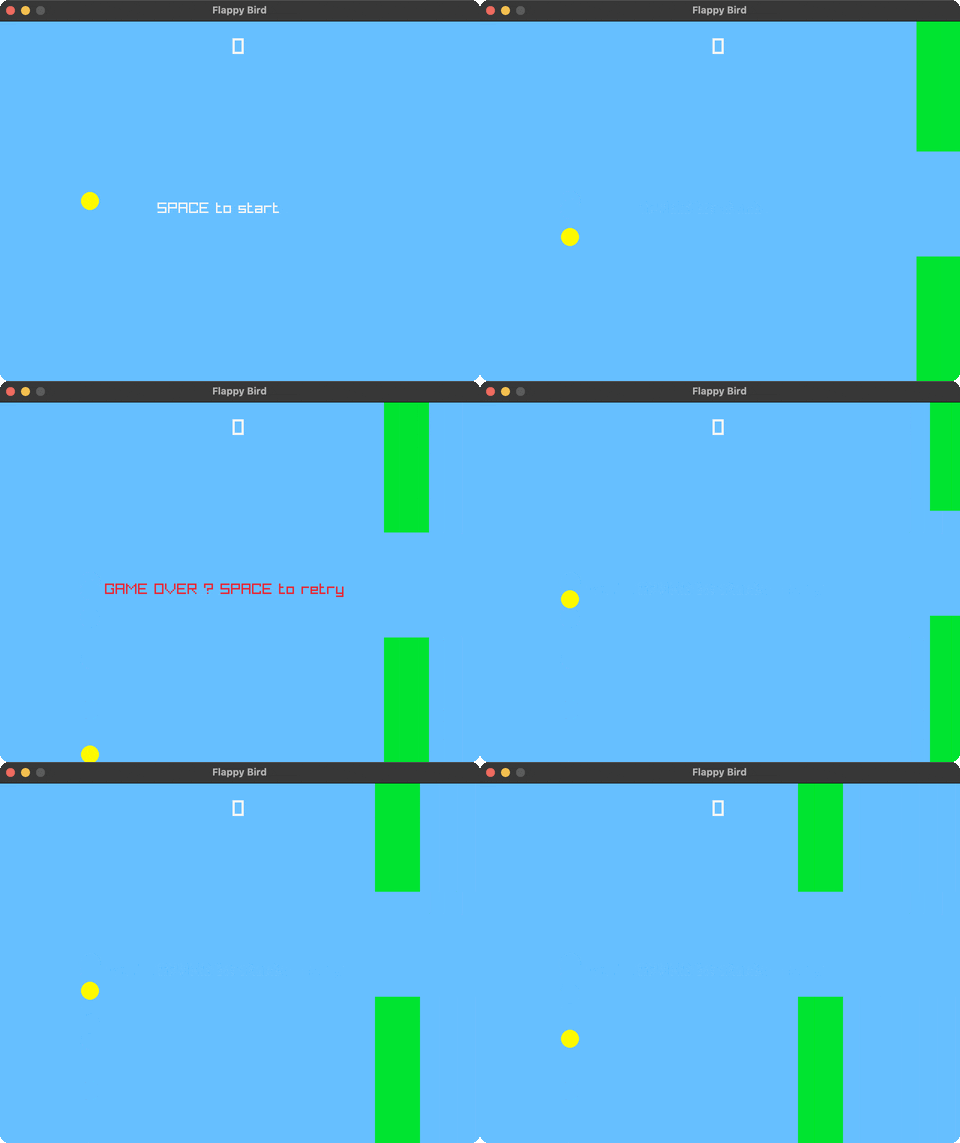
Lesson 6 — Flappy Bird
A title/playing/over state machine driven by a single key. Lesson
Where to Go Next
This course's guided material ends at Phase 5. Here's where capable, still-curious learners go from here, all outside the Lisp world this course has lived in so far, deliberately, since the whole point of Phase 3-5 was giving you enough vocabulary to read any game codebase, not just Lisp ones.
If you want to go deeper on architecture
Game Programming Patterns by Bob Nystrom, free online. You already met its vocabulary in Phase 4: Game Loop, Component (ECS), and Object Pool; the full book covers 19 patterns across five categories, classic design patterns revisited for games, plus sequencing, behavioral, decoupling, and optimization concerns. Read it once you hit your own "this doesn't scale" moment in a project, that's when each chapter actually lands.
If you want to go deeper on "close to the metal"
Handmade Hero (Casey Muratori), not a structured course, deliberately: 600+ episodes of building a full game engine from raw C, one hour at a time, explaining every decision live. This course's raylib-first, thin-FFI, no-black-box philosophy is the same spirit at a much smaller scale, Handmade Hero is what that philosophy looks like taken all the way down.
If you want a structured multi-week project
RoguelikeDev "Does the Complete Roguelike Tutorial" - an annual, community-run 8-week event: grid movement → procedural dungeon generation → field-of-view → turn-based AI → items/inventory → save/load → difficulty scaling → polish. Phase 4 gave you a taste of procedural generation and simple AI; this is the full structured version of that ladder, with a whole community doing it alongside you.
If ECS specifically hooked you
ecs-faq (SanderMertens) - an FAQ-format deep dive that goes well past what Phase 4's herfi lesson could cover: archetypes, sparse sets, query performance, real production ECS design trade-offs.
If multiplayer specifically hooked you
Awesome-Game-Networking - a curated list covering the concepts Phase 5's herfi capstone only gestured at: client-side prediction, entity interpolation, lag compensation, reliable-UDP.
If you just want to see (and build) more finished games
awesome-game-remakes and osgameclones.com: curated lists of open-source game remakes and clones, several with no paid assets required, i.e. genuinely cloneable this weekend.
One more thing
Everything in this course was built from real, shipped code in this ecosystem's own repos, not textbook examples. If you build something worth sharing, the games in Track B started exactly the same way someone else's Phase 2 exercise did. Ship it.
Phase 0: First Contact
Not public yet. This page links to
b12n-cljsapp, which is still private, so those links will 404 for now. They're being opened up as the course progresses, and this note goes away when they are. The three raylib suites the rest of the course is built on (clj, jlt, jnk) are public today.
Watch it work first
Before installing anything: clone and run the example games locally to see what you're building toward:
git clone git@github.com:burinc/b12n-cljsapp.git
cd b12n-cljsapp
npx josh public
This builds and opens nine finished browser games, Memory, Breakout, Tetris, Snake, 2048, Connect Four, Wordle, Galaga, Asteroids, plus a dashboard tying them together. Every one of them is Lisp (ClojureScript via Scittle) running directly in your browser tab, no compile step for the Clojure code itself, just plain .cljs files the browser interprets on load (npx josh above is only a tiny local dev server, needed to serve the files over http://, not to build anything). That's the whole course's promise in miniature: this is what Lisp-built games look like, and by the end of Phase 2 you'll have built several yourself.
What you're about to set up
This course's hands-on exercises run on JVM Clojure, calling raylib (a small, real C graphics library used by shipped commercial and indie games) directly through JDK's Panama foreign-function interface, no wrapper library, no codegen, the real C API. That's also why the setup below asks for JDK 22+ specifically: older JDKs can't do this.
Setup
- Install a JDK 22 or newer. Check with
java -version. If you don't have one, Eclipse Temurin is a good default. - Install the Clojure CLI. Check with
clojure -version. - Install Babashka (
bb). Check withbb --version. Whole-repo checks (bb check,bb test) arebbtasks; running one specific exercise or example usesclojure -M:run -m <its-namespace>directly, every lesson from here on gives you the exact command to run, so you won't need to remember the pattern yourself. - Clone this repo and confirm it's wired up:
   git clone git@github.com:burinc/b12n-gamedev-course.git
   cd b12n-gamedev-course
   bb tasks
You should see a list of available tasks, no errors.
macOS note
If a window you open from this course never appears, or the process hangs, you're very likely missing the -XstartOnFirstThread JVM flag - every windowed command this course teaches you to run already carries it via deps.edn's :run/:test aliases (clojure -M:run -m ..., bb test), so this should only bite you if you've built your own launcher that skips those aliases entirely. (clojure -M:check, used by bb check, does NOT carry the flag, but that's fine, since it only compiles, it never opens a window.) If you do hit this, add -J-XstartOnFirstThread to whatever command you're running yourself.
Next
Move on to Phase 1: Foundations.
Phase 1, Lesson 1: Clojure Fundamentals
Already comfortable with
def,defn,let, and basic recursion in Clojure? Skip to Phase 1, Lesson 2, The Game Loop.
Values and def
Clojure has a few essential data types: numbers, strings, keywords, vectors (indexed collections), and maps (dictionaries). You create named values with def:
(def player-name "Ada")
(def player-score 0)
(def player-position {:x 100 :y 200})
player-position
;; => {:x 100, :y 200}
Notice that :x and :y are keywords, a Clojure type that's perfect for map keys. When you evaluate player-position by itself, the REPL shows you what it contains.
Functions with defn
You define functions using defn. Here's a function that moves a position to the right:
(defn move-right [position amount]
  (update position :x + amount))

(move-right player-position 10)
;; => {:x 110, :y 200}
Important: move-right didn't change player-position: it returned a new map. Nothing in Clojure mutates by default. This matters a lot once you meet run-game! in the next lesson: your tick function will work exactly like move-right does here.
let for Local Bindings
Sometimes you need temporary variables for calculations. Use let:
(defn distance [a b]
  (let [dx (- (:x a) (:x b))
        dy (- (:y a) (:y b))]
    (Math/sqrt (+ (* dx dx) (* dy dy)))))

(distance {:x 0 :y 0} {:x 3 :y 4})
;; => 5.0
The let gives you dx and dy to work with inside the function. Outside the function, they don't exist.
Recursion with loop and recur
Clojure doesn't have traditional for-loops. Instead, it uses recursion. Here's a loop/recur pattern that counts down, the same pattern that powers run-game!'s frame loop under the hood (you'll meet its interface, the opts it takes and what it returns, in the next lesson; the loop/recur body itself stays behind that interface until you're curious enough to go read game_loop.clj yourself):
(defn countdown [n]
  (loop [remaining n acc []]
    (if (zero? remaining)
      acc
      (recur (dec remaining) (conj acc remaining)))))

(countdown 5)
;; => [5 4 3 2 1]
loop sets up the initial bindings (remaining starts at n, acc is an empty vector). recur jumps back to the top with new values. When remaining reaches zero, we return acc.
Your Turn: clamp
Write a function clamp that takes value, min-value, and max-value, returning value pinned into that range. You'll use exactly this pattern to keep a paddle or ball on-screen starting in Phase 2.
(defn clamp [value min-value max-value]
  (max min-value (min value max-value)))

(clamp 150 0 100) ;; => 100
(clamp -5 0 100)  ;; => 0
(clamp 50 0 100)  ;; => 50
The trick: (min value max-value) clamps to the max, and (max min-value ...) clamps to the min.
Ready? Move on to Phase 1, Lesson 2, The Game Loop.
Phase 1, Lesson 2: The Game Loop
Already know how game loops work and have written one before? Read the worked bouncing-ball demo to see our teaching loop, then skip to the next exercise.
The World-State Model
A game, in this course and in the HtDP / Realm of Racket tradition, is built from one immutable value (the "world") plus three pure functions:
init: called once at startup. Takes nothing, returns the initial world value.tick: called every frame. Takes the world and the time since the last frame (dt, in seconds), returns a new world with everything moved/updated for that frame.draw: called every frame (aftertick). Takes the world, draws it to the screen, returns nothing.
This model is identical to Racket's 2htdp/universe big-bang: which takes init, on-tick, and to-draw handlers and manages the loop for you. HtDP (How to Design Programs) and Realm of Racket use exactly this pattern to teach an entire language through game programming, and this course borrowed it directly because it works.
Notice what's NOT in that list: no mutable objects, no side effects inside the functions. init produces a value, tick transforms it, draw reads it. The loop itself, the window, the timing, the repeated calling, is owned by run-game!.
run-game!'s Contract
Here's run-game!'s signature and docstring, minus two advanced keys (:fixed-dt, :max-steps-per-frame) you won't need until Phase 4: every exercise through Phase 3 uses exactly what's shown here:
run-game! opts

Runs a game loop described entirely as pure functions over an
immutable world-state value. `opts`:

  :title      window title string                          (required)
  :width      window width in px                            (required)
  :height     window height in px                           (required)
  :init       (fn []) -> world                               (required)
  :tick       (fn [world dt-seconds]) -> world                (required)
  :draw       (fn [world]) -> nil, called between
              begin-drawing!/end-drawing!                     (required)
  :on-key     (fn [world keycode]) -> world, called once per
              key-press event queued this frame, in press
              order via reduce. Default: (fn [w _k] w).
  :stop?      (fn [world]) -> boolean, checked before every
              frame. Default: (constantly false).
  :background a raylib color map. Default: colors/raywhite.
  :fps        target frames per second. Default: 60.

Returns the final world value when the loop stops, the window was
closed, stop? returned true, or a RAYLIB_APP_AUTO_QUIT_MS deadline
was reached.
The only requirements are :title, :width, :height, :init, :tick, and :draw. Everything else has a sensible default. You pass a map with these keys, and run-game! owns the loop from there.
The Bouncing Ball
Here's a fully-worked example: a ball that bounces off all four edges of the window. Read it line by line, then we'll explain the key ideas.
(ns phase-1.bouncing-ball
  "Phase 1, Lesson 2's worked example, a ball that bounces off all four
   window edges. Walked through line by line in
   docs/guide/phase-1-foundations/02-the-game-loop.md."
  (:require [net.b12n.game-dev.engine.game-loop :as game-loop]
            [net.b12n.game-dev.engine.raylib.shapes.basic :as shapes]
            [net.b12n.game-dev.engine.raylib.colors :as colors]))

(def ^:private width 640)
(def ^:private height 480)
(def ^:private radius 20)
(def ^:private speed 220) ;; pixels per second

(defn- init []
  {:x radius :y (/ height 2) :dx speed :dy speed})

(defn- bounce [pos velocity low high]
  (cond
    (< pos low)  [low  (Math/abs (double velocity))]
    (> pos high) [high (- (Math/abs (double velocity)))]
    :else        [pos  velocity]))

(defn- tick [{:keys [x y dx dy]} dt]
  (let [[x' dx'] (bounce (+ x (* dx dt)) dx radius (- width radius))
        [y' dy'] (bounce (+ y (* dy dt)) dy radius (- height radius))]
    {:x x' :y y' :dx dx' :dy dy'}))

(defn- draw [{:keys [x y]}]
  (shapes/draw-circle! (int x) (int y) radius colors/maroon))

(defn -main [& _args]
  (game-loop/run-game!
   {:title  "Bouncing Ball"
    :width  width
    :height height
    :init   init
    :tick   tick
    :draw   draw}))
The World
The world is a map with four keys: - :x, :y: the ball's position (pixels from the top-left) - :dx, :dy: the ball's velocity (pixels per second in each direction)
init starts the ball at the left edge (just touching the border), vertically centered, moving diagonally at 220 pixels/second in each direction.
Why tick Returns a New Map
Remember the move-right example from Lesson 1? It used update to return a new map instead of mutating the old one:
(defn move-right [position amount]
  (update position :x + amount))
tick does the same thing. Look at how it's structured:
- Destructure the incoming world into
x,y,dx,dy. - Calculate new position:
(+ x (* dx dt)). That'sold-x + (velocity × time-since-last-frame). - Check if the new position hit a boundary, and clamp/bounce if needed.
- Return a brand-new map:
{:x x' :y y' :dx dx' :dy dy'}.
Nothing was mutated. The old world is untouched. This is how every game state update in this course works.
What dt Buys You
dt is the time (in seconds) since the last frame. Without it, your game would run at a different speed on every machine:
- On a slow computer, 16 ms might pass between frames, so each frame the ball moves
220 × 0.016 = 3.5pixels. - On a fast computer, only 8 ms passes, so each frame the ball moves
220 × 0.008 = 1.76pixels.
With dt, both machines move the ball 220 × dt pixels per frame. Physics works out. The game runs at the same speed everywhere.
Collision Detection and Bouncing
The bounce helper is doing two jobs at once:
(defn- bounce [pos velocity low high]
  (cond
    (< pos low)  [low  (Math/abs (double velocity))]
    (> pos high) [high (- (Math/abs (double velocity)))]
    :else        [pos  velocity]))
- If the ball goes past
low(the left/top edge), clamp it tolowand make velocity positive (moving away from the edge). - If the ball goes past
high(the right/bottom edge), clamp it tohighand make velocity negative (moving away from the edge). - Otherwise, leave the position and velocity alone.
Notice: it returns a two-element vector [new-position new-velocity], not a map. That's because we need both values back in tick, and a vector is a lightweight way to return multiple values.
In tick, we call bounce twice:
[x' dx'] (bounce (+ x (* dx dt)) dx radius (- width radius))
[y' dy'] (bounce (+ y (* dy dt)) dy radius (- height radius))
For the X-axis: the ball's new position is the old position plus velocity×time; the boundaries are radius (left wall) to (- width radius) (right wall, accounting for the ball's radius so it doesn't stick out).
For the Y-axis: same idea, with height instead of width.
Run It
Let's see the ball bounce:
cd /path/to/b12n-gamedev-course
RAYLIB_APP_AUTO_QUIT_MS=3000 clojure -M:run -m phase-1.bouncing-ball
A window opens showing a maroon ball bouncing diagonally. It bounces cleanly off all four edges without ever leaving the window. After 3 seconds, the window closes automatically (the RAYLIB_APP_AUTO_QUIT_MS environment variable sets a timeout for headless testing, remove it if you want to close manually).
What's Next
The ball moved on its own, every frame, tick calculated a new position. But no one was steering it. In the next exercise, you'll build something that actually responds to the player: a pair of eyes whose pupils track your mouse cursor every frame, by reading live input directly inside tick: your first taste of a world that reacts to something outside itself. (Every game in this course reads input this way, polling a key or mouse position inside tick: rather than via run-game!'s on-key handler above; polling is simpler and it's what you'll actually use.)
Next: Following Eyes.
Phase 1, Lesson 3: Following Eyes (Mouse Input)
This is your first graded exercise, no worked example walking you through every line, just a starter stub with TODOs and hints. Fill in the gaps yourself. You'll practice reading mouse input and using polar-to-Cartesian coordinate math to make a pair of eyes whose pupils track the player's cursor.
The Starter Stub
Here's exercises/phase_1/following_eyes_starter.clj, with three TODOs to fill in:
(ns phase-1.following-eyes-starter
  "Phase 1, Lesson 3, a pair of eyes whose pupils track the mouse.
   Fill in the TODOs. Compare against following_eyes.clj (the solution,
   same directory) once yours runs."
  (:require [net.b12n.game-dev.engine.game-loop :as game-loop]
            [net.b12n.game-dev.engine.raylib.core.mouse :as mouse]
            [net.b12n.game-dev.engine.raylib.shapes.basic :as shapes]
            [net.b12n.game-dev.engine.raylib.colors :as colors]))

(def ^:private width 640)
(def ^:private height 480)
(def ^:private eye-radius 60)
(def ^:private pupil-radius 20)
(def ^:private pupil-range 25) ;; how far the pupil can wander from center

(def ^:private eye-centers
  [{:x 220 :y 240} {:x 420 :y 240}])

(defn- init []
  {:mouse {:x 0 :y 0}})

(defn- tick [_world dt]
  ;; TODO: read the current mouse position (mouse/get-mouse-position
  ;; returns a {:x .. :y ..} map already) and return it as the new world.
  )

(defn- pupil-offset [eye-center mouse]
  ;; TODO: compute {:x .. :y ..}, the pupil's offset from eye-center,
  ;; pointed toward `mouse` but never further than pupil-range away.
  ;; Hints: Math/atan2 for the angle toward the mouse, Math/cos/Math/sin
  ;; to turn an angle + distance back into an x/y offset, and Lesson 1's
  ;; clamp pattern (or just `min`) to cap the distance.
  )

(defn- draw [{:keys [mouse]}]
  (doseq [center eye-centers]
    (shapes/draw-circle-v! center eye-radius colors/white)
    ;; TODO: outline the eye, draw-circle-lines-v! wants the same
    ;; args as draw-circle-v!, just no fill.
    (let [offset (pupil-offset center mouse)
          pupil  {:x (+ (:x center) (:x offset))
                  :y (+ (:y center) (:y offset))}]
      (shapes/draw-circle-v! pupil pupil-radius colors/black))))

(defn -main [& _args]
  (game-loop/run-game!
   {:title  "Following Eyes"
    :width  width
    :height height
    :init   init
    :tick   tick
    :draw   draw}))
Run Your Version
Once you've filled in the three TODOs, compile and run your code:
cd /path/to/b12n-gamedev-course
clojure -M:run -m phase-1.following-eyes-starter
Move your mouse around the window. You should see two eyes with pupils that track your cursor. The pupils should stay within the eyes' outline and never travel more than 25 pixels from the center of each eye.
Stuck?
Here are the hints from the starter code, expanded:
TODO #1 in tick: You need to capture the current mouse position every frame and return it as part of the world. mouse/get-mouse-position returns a map like {:x 320 :y 240}. Return a world map with this mouse data so draw can use it.
TODO #2 in pupil-offset: This is the math part. The pupil needs to: 1. Point toward the mouse from the eye's center (use Math/atan2 with the dy and dx between the two points). 2. Place itself at most pupil-range pixels away (use min to cap the distance). 3. Convert that angle and distance back into an offset {:x .. :y ..} (use Math/cos and Math/sin).
TODO #3 in draw: the filled white eye is already drawn for you (shapes/draw-circle-v!, right above the TODO), the one TODO here is outlining it with a black circle. Use shapes/draw-circle-lines-v!: it takes the same arguments as shapes/draw-circle-v! (center, radius, color) but draws only the outline, not the fill. This is the key visual fix that makes the eyes look right.
Compare Against the Solution
When your version runs, compare it against exercises/phase_1/following_eyes.clj (the solution, in the same directory). Both should look identical visually, two white eyes with black outlines, pupils tracking your cursor.
Important visual detail: if your eyes appear solid black instead of white with an outline, you're missing the draw-circle-lines-v! outline step. A naive approach (drawing a filled black circle on top of a filled white circle) just repaints the same circle black, you see a solid black eye. The solution uses draw-circle-lines-v! to draw only the outline, leaving the white fill inside visible. That's the difference between a correct and broken version.
Next
Polyglot Corner: Bouncing Ball, Three Lisps
You just built a bouncing ball in JVM Clojure (exercises/phase_1/bouncing_ball.clj). Here's the exact same idea, already built, in the other Lisp dialects this course's sibling repos use. You don't need to understand every line yet - just notice how much of the shape survives the jump: init/tick/draw, an immutable world value, the same raylib calls underneath.
Jolt (native Clojure, Chez Scheme, no JVM)
bounce.clj in raylib-jlt: a bouncing ball with IsKeyPressed-driven pause and an on-screen DrawFPS counter. Jolt calls raylib with zero C shim code at all, it exploits real ABI facts about how C passes small structs (you'll learn exactly how in Phase 3).
Run it yourself with cd raylib-jlt && bb bouncing-ball. Two prerequisites, both of which that repo checks for you rather than failing mysteriously:
- Jolt v0.7.23 or newer (
jolt --version). Older versions can't express the by-value struct bindings the suite now uses, and fail at compile rather than at runtime. If you don't have it:brew install jolt-lang/jolt/jolt, orcurl -sL https://raw.githubusercontent.com/jolt-lang/jolt/main/install | bash, ornix runagainst its flake. The prebuilt binary is self-contained — runtime, compiler and stdlib in one executable — and wants glibc 2.35+ on Linux x86_64 or macOS 14+ on arm64. On an Intel Mac, musl/Alpine, or older glibc you'd be building from source, which is a bigger errand than this optional aside is worth: readbounce.cljinstead and carry on. - libraylib 6.0 or newer —
bb lib:checkverifies it andbb lib:installinstalls it. This one is worth the check: raylib 6.0 changedDrawCircleGradient's signature without changing the symbol name, so a 5.5 library links happily and then draws in the wrong place.
That second point is worth a moment, because this course is on the other side of it. libs/ here ships raylib 5.5, and the engine's own draw-circle-gradient! is bound to 5.5's signature — so the two suites are each correct against the raylib they carry, and installing 6.0 for raylib-jlt does not disturb this repo, which loads its bundled 5.5 in preference to anything on your system. Two versions of the same C library, side by side, is a normal thing to end up with; what makes it survivable is that each caller is explicit about which one it wants.
Once you have a Jolt REPL open, (doc some-fn) works there the way it does in Clojure — doc, find-doc, apropos and dir all landed in Jolt v0.7.21. source and pst don't, so reading raylib.clj is still how you find out what a binding actually does.
jank (native Clojure, C++/LLVM, no JVM)
b12n-raylib-jnk's bouncing-ball port, same idea, a completely different FFI philosophy: jank draws the line at the value, not the call. A native raylib value can't leave the function that created it without being explicitly boxed first. You'll build this same ball again, deliberately, in Phase 3's comparative module.
What's identical, what's not
- Identical: the shape of the program. Every one of these has an
init, something that runs every frame to move the ball, something that draws it, and a loop that ties them together. - Not identical: how each dialect talks to raylib's C code underneath. JVM Clojure (what you're using) goes through JDK's Panama FFI. Jolt and jank each have their own answer, with real trade-offs - that's the whole subject of Phase 3.
Next
Phase 2: Arcade Classics: time to build something with an actual win/lose condition.
Lesson 1: Pong
Concepts
This lesson introduces three core game mechanics:
- Delta-time movement: how to scale motion based on elapsed time so gameplay feels consistent across different frame rates (even though we'll take a shortcut here for simplicity).
- AABB collision: axis-aligned bounding box overlap tests to detect when the ball hits a paddle.
- Score as world state: tracking score as part of your game's state dictionary, updated during gameplay and rendered each frame.
You'll implement a two-player Pong game where you control the left paddle (W to move up, S to move down) and a simple AI tracks the ball on the right side.
Starter Code
Open exercises/phase_2/pong_starter.clj and fill in the three TODOs:
(ns phase-2.pong-starter
  "Phase 2, Lesson 1, Pong. Left paddle is you (W/S), right paddle is a
   simple tracking AI. First serve to 0 points wins nothing, this is
   about the loop, not a tournament."
  (:require [net.b12n.game-dev.engine.game-loop :as game-loop]
            [net.b12n.game-dev.engine.raylib.core.keyboard :as keyboard]
            [net.b12n.game-dev.engine.raylib.enums :as enums]
            [net.b12n.game-dev.engine.raylib.shapes.basic :as shapes]
            [net.b12n.game-dev.engine.raylib.text.drawing :as text]
            [net.b12n.game-dev.engine.raylib.colors :as colors]))

(def width 640)
(def height 480)
(def paddle-width 12)
(def paddle-height 80)
(def paddle-speed 300.0)
(def ball-radius 8)
(def ball-speed 4.0)
(def ^:private left-paddle-x 0)
(def ^:private right-paddle-x (- width paddle-width))

(defn- clamp [v lo hi] (max lo (min v hi)))

(defn- init-ball []
  {:x (double (/ width 2)) :y (double (/ height 2)) :dx ball-speed :dy ball-speed})

(defn init []
  {:left-y     (double (/ (- height paddle-height) 2))
   :right-y    (double (/ (- height paddle-height) 2))
   :ball       (init-ball)
   :left-score 0
   :right-score 0})

(defn- move-left-paddle [world dt]
  ;; TODO: read :w/:s via keyboard/is-key-down?
  ;; and move :left-y, clamped to the window.
  world)

(defn- move-right-ai [world dt]
  (let [ball-y  (get-in world [:ball :y])
        target  (clamp (- ball-y (/ paddle-height 2)) 0 (- height paddle-height))
        current (:right-y world)
        step    (clamp (- target current) (- (* paddle-speed dt)) (* paddle-speed dt))]
    (update world :right-y + step)))

(defn- hits-paddle? [ball-x ball-y paddle-x paddle-y]
  ;; TODO: AABB overlap test between the ball (a
  ;; ball-radius-sized square is close enough) and a paddle rect.
  false)

(defn- move-ball [{:keys [ball left-y right-y left-score right-score] :as world} _dt]
  ;; TODO: advance the ball, bounce off top/bottom, bounce
  ;; off a paddle when hits-paddle? is true, score + reset when it
  ;; passes an edge. Hint: get the wall-bounce case working first, using
  ;; -main to watch the ball do that, before adding paddle bounce and
  ;; scoring.
  world)

(defn- tick [world dt]
  (-> world
      (move-left-paddle dt)
      (move-right-ai dt)
      (move-ball dt)))

(defn- draw [{:keys [left-y right-y ball left-score right-score]}]
  (shapes/draw-rectangle! left-paddle-x (int left-y) paddle-width paddle-height colors/raywhite)
  (shapes/draw-rectangle! right-paddle-x (int right-y) paddle-width paddle-height colors/raywhite)
  (shapes/draw-circle! (int (:x ball)) (int (:y ball)) ball-radius colors/raywhite)
  (text/draw-text! (str left-score) (- (/ width 2) 40) 20 40 colors/raywhite)
  (text/draw-text! (str right-score) (+ (/ width 2) 20) 20 40 colors/raywhite))

(defn -main [& _args]
  (game-loop/run-game!
   {:title      "Pong"
    :width      width
    :height     height
    :init       init
    :tick       tick
    :draw       draw
    :background colors/black}))
Run It
From the repo root:
clojure -M:run -m phase-2.pong-starter
When both paddles are controlled by the AI, watch the ball bounce. Then implement move-left-paddle so you can play: use W to move up, S to move down.
Hints
move-left-paddle
- Each frame,
dt(delta time) tells you how many seconds have passed since the last frame. - Movement distance is
paddle-speed * dt: this scales motion to elapsed time. - Use
keyboard/is-key-down?with keys fromenums/keyboard-key(e.g.,:wand:s). - Keep the paddle within the window using
clamp:(clamp new-y 0 (- height paddle-height)).
hits-paddle?
- A ball traveling as a circle and a paddle as a rectangle need an overlap test.
- Treat the ball as a square (width and height =
2 * ball-radius) for simplicity. - Check if the ball's bounding box overlaps the paddle's bounding box: - Ball left edge:
(- ball-x ball-radius), Ball right edge:(+ ball-x ball-radius)- Ball top edge:(- ball-y ball-radius), Ball bottom edge:(+ ball-y ball-radius)- Paddle left edge:paddle-x, Paddle right edge:(+ paddle-x paddle-width)- Paddle top edge:paddle-y, Paddle bottom edge:(+ paddle-y paddle-height) - Two rectangles overlap if they overlap on both axes.
move-ball
- Start by handling wall bounces (top and bottom). Update the ball's
yanddy(vertical velocity). - If the ball goes above the top (y' < ball-radius), clamp it and flip the sign ofdy. - If the ball goes below the bottom (y' > height - ball-radius), clamp it and flip the sign ofdy. - Next, add paddle bounces: - Check if the ball is moving left (
dx < 0) and hits the left paddle. If so, reposition the ball just past the paddle and flipdxto positive. - Check if the ball is moving right (dx > 0) and hits the right paddle. If so, reposition the ball just past the paddle and flipdxto negative. - Finally, add scoring: - If the ball goes off the left edge (
x' < 0), the right player scores and the ball resets to center. - If the ball goes off the right edge (x' > width), the left player scores and the ball resets to center.
Compare Against the Solution
Once you've got it working, read exercises/phase_2/pong.clj to compare your implementation.
A Note on Delta Time
You'll notice that the ball's dx and dy velocities are not scaled by dt: the ball moves by raw pixel amounts each frame (dx pixels per frame, dy pixels per frame), not time-scaled. This is a deliberate simplification for this lesson: it only looks correct at a fixed target frame rate (here, 60 FPS). Real games scale velocity by dt, like the bouncing-ball demo in Phase 1, Lesson 2.
This is a limitation of the current approach: frame-rate-dependent gameplay is fragile. Phase 4's "fixed timestep" lesson exists specifically to solve this problem properly. For now, understand that this works at 60 FPS but would look wrong on a 30 FPS device or a 120 FPS display. That's a preview of why time-scaled movement matters.
Polyglot Corner
See this same design in other Clojure raylib bindings:
- Jolt + raylib-jlt:
raylib-jlt/src/net/b12n/raylib_jlt/pong.clj, two-paddle classic, you (W/S) vs a ball-tracking CPU. - Clojure (JVM) + raylib-clj:
b12n-raylib-clj/src/examples/pong.clj, another Pong variant for comparison.
Next: Lesson 2: Breakout
Lesson 2: Breakout
Concepts
This lesson introduces two key new mechanics:
- Collision Response: when the ball hits the paddle, the angle it bounces at depends on where it hit. Hitting near the paddle's edges sends the ball out at shallow angles; hitting near the center sends it straighter up.
- Destructible Objects and Level Layout as Data: a grid of bricks that can be destroyed, represented as a vector of booleans and rendered from procedural layout constants.
You'll implement a single-player Breakout (Brick Breaker) game where you control a paddle at the bottom to bounce a ball up and clear all the bricks. The ball's outgoing angle from the paddle depends on the hit location, a core mechanic of the original Breakout arcade cabinet.
Starter Code
Open exercises/phase_2/breakout_starter.clj and fill in the three TODOs:
(ns phase-2.breakout-starter
  "Phase 2, Lesson 2, Breakout. A/D or Left/Right move the paddle; where
   the ball hits the paddle changes the angle it leaves at, same as the
   original."
  (:require [net.b12n.game-dev.engine.game-loop :as game-loop]
            [net.b12n.game-dev.engine.raylib.core.keyboard :as keyboard]
            [net.b12n.game-dev.engine.raylib.enums :as enums]
            [net.b12n.game-dev.engine.raylib.shapes.basic :as shapes]
            [net.b12n.game-dev.engine.raylib.text.drawing :as text]
            [net.b12n.game-dev.engine.raylib.colors :as colors]))

(def width 640)
(def height 480)
(def paddle-width 100)
(def paddle-height 16)
(def paddle-y (- height 40))
(def paddle-speed 320.0)
(def ball-radius 8)
(def ball-speed 4.0)
(def rows 5)
(def cols 10)
(def brick-w 56)
(def brick-h 20)
(def brick-gap 4)
(def brick-top 60)
(def brick-left (/ (- width (* cols (+ brick-w brick-gap))) 2))
(def row-colors [colors/red colors/orange colors/gold colors/green colors/skyblue])

(defn- brick-rect [i]
  (let [row (quot i cols) col (mod i cols)]
    {:x (+ brick-left (* col (+ brick-w brick-gap)))
     :y (+ brick-top (* row (+ brick-h brick-gap)))
     :w brick-w :h brick-h :color (nth row-colors row)}))

(defn init []
  {:paddle-x (double (/ (- width paddle-width) 2))
   :ball     {:x (double (/ width 2)) :y (double (- paddle-y ball-radius 40))
              :dx (* ball-speed 0.6) :dy (- ball-speed)}
   :bricks   (vec (repeat (* rows cols) true))
   :status   :playing}) ;; :playing, :won, :lost

(defn- clamp [v lo hi] (max lo (min v hi)))

(defn- move-paddle [world dt]
  ;; TODO: same shape as Pong's paddle mover, horizontal this time.
  world)

(defn- brick-hit-index [bricks x y]
  ;; TODO: find the index of the first alive brick whose rect overlaps the ball.
  nil)

(defn- move-ball [{:keys [paddle-x ball bricks] :as world} _dt]
  (let [{:keys [x y dx dy]} ball
        x' (+ x dx)
        y' (+ y dy)
        [x2 dx2] (cond
                   (< x' ball-radius) [ball-radius (Math/abs dx)]
                   (> x' (- width ball-radius)) [(- width ball-radius) (- (Math/abs dx))]
                   :else [x' dx])
        [y2 dy2] (if (< y' ball-radius) [ball-radius (Math/abs dy)] [y' dy])
        hit-i    (brick-hit-index bricks x2 y2)]
    (cond
      (> y2 height)
      (assoc world :status :lost)

      (some? hit-i)
      (let [bricks' (assoc bricks hit-i false)]
        (-> world
            (assoc :bricks bricks')
            (assoc :ball {:x x2 :y y2 :dx dx2 :dy (- dy2)})
            (cond-> (not (some true? bricks')) (assoc :status :won))))

      ;; paddle: hit location changes the outgoing angle
      (and (pos? dy2)
           (>= (+ y2 ball-radius) paddle-y)
           (<= y2 (+ paddle-y paddle-height))
           (>= (+ x2 ball-radius) paddle-x)
           (<= (- x2 ball-radius) (+ paddle-x paddle-width)))
      (let [;; TODO: 0 at the paddle's left edge, 1 at its right edge, map that
            ;; linearly to an outgoing dx between -ball-speed and +ball-speed.
            hit-ratio 0.0
            new-dx    0.0]
        (assoc world :ball {:x x2 :y (- paddle-y ball-radius) :dx new-dx :dy (- (Math/abs dy2))}))

      :else
      (assoc world :ball {:x x2 :y y2 :dx dx2 :dy dy2}))))

(defn- tick [world dt]
  (if (= :playing (:status world))
    (-> world (move-paddle dt) (move-ball dt))
    world))

(defn- draw [{:keys [paddle-x ball bricks status]}]
  (dotimes [i (* rows cols)]
    (when (nth bricks i)
      (let [{:keys [x y w h color]} (brick-rect i)]
        (shapes/draw-rectangle! x y w h color))))
  (shapes/draw-rectangle! (int paddle-x) paddle-y paddle-width paddle-height colors/raywhite)
  (shapes/draw-circle! (int (:x ball)) (int (:y ball)) ball-radius colors/raywhite)
  (case status
    :won  (text/draw-text! "YOU WIN" 240 200 40 colors/green)
    :lost (text/draw-text! "GAME OVER" 220 200 40 colors/red)
    nil))

(defn -main [& _args]
  (game-loop/run-game!
   {:title      "Breakout"
    :width      width
    :height     height
    :init       init
    :tick       tick
    :draw       draw
    :background colors/black}))
Run It
From the repo root:
clojure -M:run -m phase-2.breakout-starter
Use A/D or Left/Right arrow keys to move the paddle and bounce the ball into the bricks.
Hints
move-paddle
- Same structure as Pong's paddle movement, but horizontal.
- Read keyboard input for A/Left (move left) and D/Right (move right) from
enums/keyboard-key. - Scale movement by
paddle-speed * dt. - Clamp the paddle's
xposition to stay within the window:(clamp new-x 0 (- width paddle-width)).
brick-hit-index
- Filter the
:bricksvector for indices where(nth bricks i)istrue(alive bricks only). - For each candidate brick, get its rectangle via
(brick-rect i). - Test if the ball's bounding box (a square from
(- x ball-radius)to(+ x ball-radius)horizontally and vertically) overlaps the brick's rectangle. - Return the index of the first brick that overlaps, or
nilif none do. - Use
mapto compute each brick rect once, then filter on the rectangle to avoid redundant calls.
Paddle-bounce hit-ratio
- Calculate where on the paddle the ball hit:
(/ (- ball-x paddle-x) paddle-width). - Clamp this ratio to
[0.0, 1.0]. - Map the ratio linearly to
dxbetween-ball-speedand+ball-speed: when ratio is 0 (left edge),dx = -ball-speed; when ratio is 1 (right edge),dx = +ball-speed. - The formula:
(* ball-speed (- (* 2 hit-ratio) 1.0)).
Compare Against the Solution
Once you've got it working, read exercises/phase_2/breakout.clj to compare your implementation.
A Note on Ball Speed
Like Pong, the ball's movement is not scaled by dt: it moves by raw dx/dy pixels per frame. The ball-speed constant (4.0) must be small enough that the ball doesn't "tunnel" through bricks or the paddle on a single tick.
The brick collision window is approximately brick-w + 2*ball-radius = 72 pixels. The paddle collision window is approximately paddle-width + 2*ball-radius = 116 pixels. A ball moving 4.7 pixels per tick (the magnitude of the initial velocity, √(2.4² + 4.0²)) leaves plenty of margin to be detected on collision. If ball-speed were much larger, the ball would pass through objects without triggering the collision check, exactly the bug that broke Pong in early testing.
Before shipping a solution, always run it in simulation to verify that: 1. Multiple bricks actually get destroyed (not just one, which could happen by luck). 2. The ball can eventually fall past the paddle and trigger the :lost state.
Polyglot Corner
See this same design in other Clojure raylib bindings:
- Jolt + raylib-jlt:
breakout.clj, paddle (mouse-controlled) + ball + brick grid, clear to win.
Previous: Lesson 1: Pong · Next: Lesson 3: Snake
Lesson 3: Snake
Concepts
This lesson introduces three key ideas that make Snake mechanically different from every earlier game:
- Discrete Grid Movement: the snake moves on a fixed grid, advancing one cell at a time on a timer (
move-interval), not every frame. This is the first game in this ladder that isn't continuous per-frame motion. - Growing Data Structure: the snake's body is a vector that grows when it eats food and shrinks (via tail removal) when it moves without eating. A single
step-snakefunction handles both cases. - Self-Collision Detection: the snake can crash into its own body, ending the game. The collision check is simple: verify the new head position doesn't overlap the rest of the body.
You'll implement a single-player Snake where you steer with arrow keys, eat food to grow, and avoid hitting yourself or the walls (which wrap around).
Starter Code
Open exercises/phase_2/snake_starter.clj and fill in the two TODOs:
(ns phase-2.snake-starter
  "Phase 2, Lesson 3, Snake. Arrow keys steer; can't reverse directly
   into yourself. Moves on a fixed grid tick, not every frame, the
   first game in this ladder that isn't continuous motion."
  (:require [net.b12n.game-dev.engine.game-loop :as game-loop]
            [net.b12n.game-dev.engine.raylib.core.keyboard :as keyboard]
            [net.b12n.game-dev.engine.raylib.enums :as enums]
            [net.b12n.game-dev.engine.raylib.shapes.basic :as shapes]
            [net.b12n.game-dev.engine.raylib.text.drawing :as text]
            [net.b12n.game-dev.engine.raylib.colors :as colors]))

(def cell-size 20)
(def cols 32)
(def rows 24)
(def width (* cols cell-size))
(def height (* rows cell-size))
(def move-interval 0.12) ;; seconds between grid steps

(defn- rand-cell [] {:x (rand-int cols) :y (rand-int rows)})

(defn- rand-free-cell
  "A random cell not occupied by any of `occupied` (the snake's own body).
   Food that spawns inside the snake is both unreachable-without-dying and,
   for most spawns, simply invisible under the snake, never place it
   there.

   Computes the actual free-cell set rather than rejection-sampling
   rand-cell against `taken`: rejection sampling is simpler but can loop
   forever if the board is ever completely full. That's unreachable
   during normal play (it means the snake filled the whole board), but a
   defensive fallback beats a silent hang if it ever somehow happens."
  [occupied]
  (let [taken (set occupied)
        free  (remove taken (for [x (range cols) y (range rows)] {:x x :y y}))]
    (if (seq free)
      (rand-nth free)
      (rand-cell))))

(defn init []
  (let [snake [{:x 16 :y 12} {:x 15 :y 12} {:x 14 :y 12}]]
    {:snake        snake
     :direction    [1 0]
     :pending-dir  [1 0]
     :food         (rand-free-cell snake)
     :move-timer   0.0
     :status       :playing}))

(def ^:private opposite {[1 0] [-1 0] [-1 0] [1 0] [0 1] [0 -1] [0 -1] [0 1]})

(defn- read-direction [{:keys [direction] :as world}]
  ;; TODO: Implement direction reading using keyboard input.
  ;; Similar pattern to solution: check if any arrow key is pressed,
  ;; store the wanted direction, and update :pending-dir only if
  ;; the wanted direction is not the opposite of current direction.
  world)

(defn- step-snake [{:keys [snake direction food] :as world}]
  ;; TODO: Implement snake movement and collision detection.
  ;; Compute the new head position by moving from current head in the direction.
  ;; Decide whether to grow (if new head equals food) or slide (remove tail).
  ;; Detect self-collision: check if new head collides with rest of body.
  ;; Return :lost status if collision, otherwise update snake and food -
  ;; and when you respawn food after eating, use `rand-free-cell` (not
  ;; `rand-cell`) on the NEW body, or food can spawn inside the snake
  ;; itself, which is unreachable without dying.
  world)

(defn- tick [world dt]
  (if (not= :playing (:status world))
    world
    (let [world (read-direction world)
          timer (+ (:move-timer world) dt)]
      (if (>= timer move-interval)
        (-> world
            (assoc :direction (:pending-dir world))
            (assoc :move-timer (- timer move-interval))
            step-snake)
        (assoc world :move-timer timer)))))

(defn- draw-cell [{:keys [x y]} color]
  (shapes/draw-rectangle! (* x cell-size) (* y cell-size) (dec cell-size) (dec cell-size) color))

(defn- draw [{:keys [snake food status]}]
  (draw-cell food colors/red)
  (doseq [segment snake] (draw-cell segment colors/green))
  (when (= :lost status)
    (text/draw-text! "GAME OVER" 220 200 40 colors/raywhite)))

(defn -main [& _args]
  (game-loop/run-game!
   {:title      "Snake"
    :width      width
    :height     height
    :init       init
    :tick       tick
    :draw       draw
    :background colors/black}))
Run It
From the repo root:
clojure -M:run -m phase-2.snake-starter
Use arrow keys to steer the snake. Eat the red food square to grow; avoid hitting yourself or the walls wrap around, they don't stop you, they just bring you out the other side.
Hints
read-direction
- Each frame,
dt(delta time) tells you how many seconds have passed since the last frame. - Use
keyboard/is-key-pressed?with keys fromenums/keyboard-key(e.g.,:right,:left,:up,:down). This function returns true once per press (not held), which is ideal for direction input. - Store the wanted direction, but only update
:pending-dirif the wanted direction is not the opposite of the current direction (using theoppositemap). - The
oppositemap prevents you from reversing directly into your own body: if you're moving right[1 0], pressing left[-1 0]is ignored until the next grid step.
step-snake
The key insight: grow if you ate food, slide if you didn't.
- Compute the new head by taking the current head
(first snake)and moving it in the:directionby one grid cell. - Usemodfor wrapping:(mod (+ x dx) cols)for the x-coordinate,(mod (+ y dy) rows)for y. - Decide grow-vs-slide: compare the new head position with
:food. - If they're equal, you ate food:body = [new-head] + (entire old snake). - If not, you're sliding:body = [new-head] + (all but last of old snake)viabutlast. - Detect self-collision: check if
new-headappears anywhere in(rest body). - Use(some #(= new-head %) (rest body))to test. - If there's a collision, return(assoc world :snake body :status :lost): include the updated:snake body, not just:status, so the final drawn frame actually shows the head touching the body instead of the position one tick earlier. - Update food if eaten via
(assoc :food (rand-free-cell body)): the NEWbody(post-move), notsnake. Userand-free-cell, not plainrand-cell, here. Plainrand-celldoesn't check the snake's own position, so it will sometimes place food directly under a body segment, and reaching that food is unavoidable death: on the tick you eat it,bodystill contains that segment (it's the whole old snake, since you grew instead of sliding), sohit-self?sees your new head land on a cell that's also still occupied by the segment you just "ate," and the collision check fires.rand-free-cell(defined aboveinit) rejects any candidate cell the snake currently occupies before returning one.
Discrete Grid Movement vs. Continuous
Unlike Pong and Breakout, Snake's movement is not every frame. The tick function accumulates :move-timer until it reaches move-interval (0.12 seconds). Only then does step-snake run.
This means: - The snake always moves at a consistent speed regardless of frame rate. - Input is read every frame via read-direction, but :pending-dir is only applied at the next grid step. - read-direction runs even when the timer hasn't elapsed yet, it's non-blocking and just updates state.
Compare Against the Solution
Once you've got it working, read exercises/phase_2/snake.clj to compare your implementation.
A Note on Direction Input
You'll notice that read-direction uses is-key-pressed? (a single event per press) rather than is-key-down? (held). This prevents spam-queueing direction changes during a single grid step, you can only queue one new direction per grid tick. The :pending-dir field acts as a buffer: the direction you wanted is stored, and applied at the next grid step.
Polyglot Corner
See this same design in other Clojure raylib bindings:
- Jolt + raylib-jlt:
raylib-jlt/src/net/b12n/raylib_jlt/snake.clj, classic snake, arrow keys, grow, don't crash.
Next: Lesson 4: Space Invaders
Lesson 4: Space Invaders
Concepts
This lesson introduces techniques for managing multiple entities of different types as simple data structures, along with formation-level collision detection and win/lose conditions over a whole collection. Space Invaders is the first game in this ladder where the enemy is not a single object, but a grid of entities that move together:
- Multiple Entity Types as Data: the player, a single bullet (or nil), and an array of enemies are all just maps. No objects, no inheritance; just plain Clojure data.
- Formation Movement: all enemies move as one unit. When any enemy touches an edge, the entire formation drops and reverses direction (
enemy-dir). This is coordination at the collection level. - One Bullet in Flight: unlike modern games, classic Space Invaders only allows one bullet at a time. The
:bulletfield is eithernilor a map; it can only spawn when the previous bullet has been destroyed or left the screen. - Win/Lose Conditions Over Collections: the game ends when all enemies are destroyed (
:status :won) or when any alive enemy reaches the player row (:status :lost).
You'll implement a single-player Space Invaders where you move left/right, fire upward, and either clear all enemies before they reach you or lose when they do.
Starter Code
Open exercises/phase_2/space_invaders_starter.clj and fill in the three TODOs:
(ns phase-2.space-invaders-starter
  "Phase 2, Lesson 4, Space Invaders. Left/Right move, Space fires (one
   bullet in flight at a time, classic-style). The enemy formation
   marches as one unit and drops a row whenever it touches an edge."
  (:require [net.b12n.game-dev.engine.game-loop :as game-loop]
            [net.b12n.game-dev.engine.raylib.core.keyboard :as keyboard]
            [net.b12n.game-dev.engine.raylib.enums :as enums]
            [net.b12n.game-dev.engine.raylib.shapes.basic :as shapes]
            [net.b12n.game-dev.engine.raylib.text.drawing :as text]
            [net.b12n.game-dev.engine.raylib.colors :as colors]))

(def width 640)
(def height 480)
(def player-w 40) (def player-h 16)
(def player-y (- height 40))
(def player-speed 260.0)
(def bullet-w 4) (def bullet-h 12) (def bullet-speed 360.0)
(def enemy-w 30) (def enemy-h 20) (def enemy-gap 12)
(def enemy-rows 4) (def enemy-cols 8)
(def enemy-speed 40.0)
(def enemy-drop 20)

(defn- init-enemies []
  (vec (for [row (range enemy-rows) col (range enemy-cols)]
         {:x (+ 60 (* col (+ enemy-w enemy-gap)))
          :y (+ 40 (* row (+ enemy-h enemy-gap)))
          :alive? true})))

(defn init []
  {:player-x   (double (/ (- width player-w) 2))
   :bullet     nil ;; {:x :y} or nil when no bullet is in flight
   :enemies    (init-enemies)
   :enemy-dir  1
   :status     :playing})

(defn- clamp [v lo hi] (max lo (min v hi)))

(defn- move-player [world dt]
  (let [delta (* player-speed dt)]
    (cond
      (keyboard/is-key-down? (:left enums/keyboard-key))
      (update world :player-x #(clamp (- % delta) 0 (- width player-w)))
      (keyboard/is-key-down? (:right enums/keyboard-key))
      (update world :player-x #(clamp (+ % delta) 0 (- width player-w)))
      :else world)))

(defn- maybe-fire [{:keys [bullet player-x] :as world}]
  ;; TODO: only spawn a bullet when none is in flight AND the space key was just pressed.
  world)

(defn- move-bullet [{:keys [bullet] :as world} dt]
  (if (nil? bullet)
    world
    (let [y' (- (:y bullet) (* bullet-speed dt))]
      (if (neg? y')
        (assoc world :bullet nil)
        (assoc world :bullet (assoc bullet :y y'))))))

(defn- bullet-hits? [bullet enemy]
  ;; TODO: AABB overlap between the bullet rect and an enemy rect.
  false)

(defn- resolve-hit [{:keys [bullet enemies] :as world}]
  (let [hit-idx (some (fn [i] (when (and (:alive? (nth enemies i)) (bullet-hits? bullet (nth enemies i))) i))
                      (range (count enemies)))]
    (if hit-idx
      (-> world
          (update :enemies assoc-in [hit-idx :alive?] false)
          (assoc :bullet nil))
      world)))

(defn- move-enemies [{:keys [enemies enemy-dir] :as world} dt]
  ;; TODO: compute whether the alive formation's bounds touch the edge it's
  ;; currently moving toward (direction-aware! checking both edges
  ;; unconditionally re-triggers every tick after the first flip, since a
  ;; drop only changes :y, not :x, see the lesson's hints for why);
  ;; if so, drop every enemy down by `enemy-drop` and flip `enemy-dir`,
  ;; otherwise shift every enemy horizontally by `enemy-speed * enemy-dir * dt`.
  world)

(defn- tick [world dt]
  (if (not= :playing (:status world))
    world
    (let [world (-> world (move-player dt) maybe-fire (move-bullet dt) resolve-hit (move-enemies dt))
          enemies (:enemies world)]
      (cond
        (not-any? :alive? enemies) (assoc world :status :won)
        (some #(and (:alive? %) (> (+ (:y %) enemy-h) player-y)) enemies) (assoc world :status :lost)
        :else world))))

(defn- draw [{:keys [player-x bullet enemies status]}]
  (shapes/draw-rectangle! (int player-x) player-y player-w player-h colors/green)
  (when bullet (shapes/draw-rectangle! (int (:x bullet)) (int (:y bullet)) bullet-w bullet-h colors/raywhite))
  (doseq [e enemies :when (:alive? e)]
    (shapes/draw-rectangle! (int (:x e)) (int (:y e)) enemy-w enemy-h colors/red))
  (case status
    :won  (text/draw-text! "YOU WIN" 240 200 40 colors/green)
    :lost (text/draw-text! "GAME OVER" 220 200 40 colors/red)
    nil))

(defn -main [& _args]
  (game-loop/run-game!
   {:title      "Space Invaders"
    :width      width
    :height     height
    :init       init
    :tick       tick
    :draw       draw
    :background colors/black}))
Run It
From the repo root:
clojure -M:run -m phase-2.space-invaders-starter
Use arrow keys to move left and right. Press Space to fire. Destroy all enemies to win; if any reach the bottom row (where your ship sits), you lose.
Hints
maybe-fire
You can only fire when: 1. No bullet is already in flight (:bullet is nil), and 2. The Space key was just pressed (not held).
Use keyboard/is-key-pressed? to detect a single press event, and spawn a bullet at the player's center x-coordinate, at player-y (the player's y position). The bullet map should have :x and :y keys.
bullet-hits?
Implement AABB (Axis-Aligned Bounding Box) overlap detection between the bullet rectangle and an enemy rectangle:
- The bullet occupies the rectangle
[bullet.x, bullet.x + bullet-w] × [bullet.y, bullet.y + bullet-h]. - The enemy occupies the rectangle
[enemy.x, enemy.x + enemy-w] × [enemy.y, enemy.y + enemy-h]. - Two rectangles overlap if they share any area on both axes (including touching edges).
Overlap condition: two intervals [a, a+w] and [b, b+w'] overlap if and only if a + w >= b and b + w' >= a. Apply this to both x and y axes.
move-enemies
The alive formation moves as one unit:
- Find the alive enemies (filter by
:alive?). - Compute their bounding box: find the minimum and maximum x-coordinates among all alive enemies. - The left edge is
min-x. - The right edge ismax-x + enemy-w(the rightmost enemy's far side). - Detect edge collision, direction-aware: check the edge the formation is currently moving toward, not both edges unconditionally, moving right (
enemy-dirpositive), it hits an edge when the right edge is close to the right boundary (e.g.,>= (- width 10)); moving left (enemy-dirnegative), when the left edge is close to the left boundary (e.g.,<= 10). - Why direction-aware matters: a drop-and-flip doesn't changemin-x/max-x: only:ymoves,:xdoesn't. If you check both edges every tick regardless of direction, the formation is still touching the same edge on the very next tick (nothing moved horizontally), so it drops and flips again, and again, every tick, forever, without ever resuming horizontal movement. The formation freezes at the edge and marches straight down instead of marching side to side, hits the player row in seconds, and:wonbecomes unreachable. Checking only the edge you're moving toward means that right after a flip, you're moving away from the edge you just touched, so the check is false and horizontal movement resumes next tick, exactly like real Space Invaders. - If edge collision, drop the formation: - Increase every enemy's
:ybyenemy-drop. - Flip:enemy-dir(multiply by -1). - Otherwise, shift every enemy horizontally by
enemy-speed * enemy-dir * dt.
Remember: enemy-dir is 1 (moving right) or -1 (moving left). The direction determines the sign of the horizontal shift.
Discrete vs. Continuous Motion
Unlike Snake's timer-based movement, Space Invaders' enemies and bullet move every frame, scaled by dt. This gives smooth continuous motion. The formation drop only happens at edge collision, not on a timer.
Compare Against the Solution
Once you've got it working, read exercises/phase_2/space_invaders.clj to compare your implementation.
A Note on One Bullet at a Time
The classic Space Invaders constraint, one bullet per ship, is a design choice, not a technical limitation. It makes the game harder: you must time your shots carefully. Modern games often allow multiple bullets because it feels more responsive. Here, maybe-fire enforces the constraint by checking :bullet before spawning.
Polyglot Corner
See this same design in other Clojure raylib bindings:
- Jolt + raylib-jlt:
raylib-jlt/src/net/b12n/raylib_jlt/space_invaders.clj, marching alien grid, shoot up.
Next: Lesson 5: Tetris
Lesson 5: Tetris
Concepts
This lesson covers the fundamental architecture of a falling-block puzzle game: rotations in 2D, grid-based collision detection, line clearing as a state transition, and an explicit finite-state machine (falling → locking → clearing → spawning). Unlike the action games in earlier lessons, Tetris has distinct phases: a piece falls freely, collides with the floor or another piece, locks in place, lines clear, and the next piece spawns.
- 2D Matrix as Core Data Structure: The board is a
rows × cols2D vector of cells, each eithernil(empty) or a color (filled). Pieces are represented as offsets within a 4×4 rotation box, decoupled from the board itself. - Piece Rotation: A 90-degree clockwise rotation transforms each offset
[r c]to[c, 3-r]within a 4×4 box. This is a mathematical operation, not a sprite animation. - Collision Detection via Boundary Checks: A placement is valid if every cell of the piece (1) is within bounds horizontally, (2) does not go below the board, and (3) does not overlap an already-locked piece. Negative rows (above the visible board) are allowed during spawn.
- Line Clearing: When a piece locks, any row with all cells filled is removed. Rows above shift down, and empty rows are added to the top. Score increases by 100 per cleared line.
- Explicit State Machine: The game progresses through: falling (piece descends each tick), locking (piece collides, gets fixed to the board), clearing (full lines are removed), spawning (a new piece appears), and lost (no room for a new piece).
Scope note, this is a simplified Tetris: it uses 90-degree rotation with no wall-kick table. If a rotation would push the piece out of bounds or into a filled cell, it is simply rejected-the piece stays in its original orientation. Real Tetris (SRS: Super Rotation System) nudges pieces back in; this version does not. The game also has no piece preview or hold buffer. This simplification keeps the focus on the core mechanics (rotation, grid, line clear, state machine) without the complexity of SRS or preview logic.
A second, smaller simplification worth naming: rotation is a raw "spin the 4x4 box" transform, (r,c) -> (c, 3-r), which pivots around the box's center rather than each piece's own visual center. For six of the seven pieces this is invisible, they either aren't 4-cell-symmetric enough to notice, or (the I piece) return to horizontal every two rotations and to their exact starting row every four, which reads as normal spinning (it flips between row 1 and row 2 rather than staying put, but the flip is small enough to miss mid-game). The O piece is the one case that would be visibly wrong (it would translate one cell diagonally every press instead of staying put, since it's a 2x2 block not centered in the 4x4 box), rotate-piece special-cases it to never rotate at all, matching how real Tetris (and SRS) treat O as having a single rotation state. The I piece's row drift is real but subtle enough, and consistent with "no wall-kicks" being an accepted simplification already, that this course leaves it as-is rather than rewriting the rotation transform to properly re-center every piece; a real per-piece rotation-state table (like SRS uses) is the production-grade fix, and a good "go further" exercise if you want one.
You'll implement a single-player Tetris where pieces fall, rotate, move left/right (with Down for soft-drop acceleration), lock when they hit obstacles, and clear lines as they fill.
Starter Code
Open exercises/phase_2/tetris_starter.clj and fill in the three TODOs:
(ns phase-2.tetris-starter
  "Phase 2, Lesson 5, Tetris (simplified: 90-degree rotation, no wall
   kicks, no hold/preview). Left/Right move, Up rotates, Down soft-drops."
  (:require [net.b12n.game-dev.engine.game-loop :as game-loop]
            [net.b12n.game-dev.engine.raylib.core.keyboard :as keyboard]
            [net.b12n.game-dev.engine.raylib.enums :as enums]
            [net.b12n.game-dev.engine.raylib.shapes.basic :as shapes]
            [net.b12n.game-dev.engine.raylib.text.drawing :as text]
            [net.b12n.game-dev.engine.raylib.colors :as colors]))

(def cols 10)
(def rows 20)
(def cell 24)
(def width (* cols cell))
(def height (* rows cell))
(def fall-interval 0.5)

;; Every shape is a set of [row col] offsets inside a 4x4 box (col/row 0..3).
(def shapes
  {:I [[1 0] [1 1] [1 2] [1 3]]
   :O [[0 1] [0 2] [1 1] [1 2]]
   :T [[0 1] [1 0] [1 1] [1 2]]
   :S [[0 1] [0 2] [1 0] [1 1]]
   :Z [[0 0] [0 1] [1 1] [1 2]]
   :J [[0 0] [1 0] [1 1] [1 2]]
   :L [[0 2] [1 0] [1 1] [1 2]]})

(def piece-color
  {:I colors/skyblue :O colors/yellow :T colors/purple
   :S colors/green :Z colors/red :J colors/blue :L colors/orange})

(defn- rotate-cw [offsets]
  ;; TODO: Rotate each [r c] offset inside a 4x4 box by transforming it
  ;; to [c, 3-r]. This represents a 90-degree clockwise rotation around
  ;; the box's center.
  )

(defn- rand-kind [] (rand-nth (keys shapes)))

(defn- spawn [kind]
  {:kind kind :offsets (shapes kind) :row 0 :col 3})

(defn init []
  {:board       (vec (repeat rows (vec (repeat cols nil))))
   :current     (spawn (rand-kind))
   :fall-timer  0.0
   :status      :playing})

(defn- cell-positions [{:keys [offsets row col]}]
  (map (fn [[r c]] [(+ row r) (+ col c)]) offsets))

(defn- fits? [board positions]
  ;; TODO: Return true if every [r c] position is valid. A position is
  ;; valid when: (1) it is within bounds horizontally (0 <= c < cols),
  ;; (2) it does not go below the board (r < rows), and (3) for
  ;; non-negative rows only (rows above the board don't count), the cell
  ;; at [r c] is empty (nil). Negative rows are used during spawn and
  ;; should always be considered valid.
  )

(defn- move-piece [{:keys [board current] :as world} dcol]
  (let [moved (update current :col + dcol)]
    (if (fits? board (cell-positions moved))
      (assoc world :current moved)
      world)))

(defn- rotate-piece [{:keys [board current] :as world}]
  ;; The O piece is a special case: it's a perfect 2x2 square, so real
  ;; Tetris (and SRS) treats it as having a single rotation state, it
  ;; never actually changes shape. Our raw box rotation (r,c) -> (c,3-r)
  ;; pivots around the CENTER of the 4x4 box, but O's 2x2 isn't centered
  ;; there (it sits at rows 0-1, cols 1-2), so rotating it would visibly
  ;; translate it by one cell each press instead of leaving it in place.
  (if (= :O (:kind current))
    world
    (let [rotated (assoc current :offsets (rotate-cw (:offsets current)))]
      (if (fits? board (cell-positions rotated))
        (assoc world :current rotated)
        world))))

(defn- clear-lines [board]
  ;; TODO: Remove every row that is completely filled (every cell is
  ;; non-nil). Return a map {:board <new-board> :cleared <count>} where
  ;; <new-board> has all non-full rows preserved in order, and the
  ;; appropriate number of empty rows added back to the top to maintain
  ;; a 20-row board.
  )

(defn- lock-piece [{:keys [board current] :as world}]
  (let [locked (reduce (fn [b [r c]]
                         (if (neg? r) b (assoc-in b [r c] (piece-color (:kind current)))))
                       board (cell-positions current))
        {:keys [board cleared]} (clear-lines locked)
        next-piece (spawn (rand-kind))]
    (-> world
        (assoc :board board)
        (update :score (fnil + 0) (* cleared 100))
        (assoc :current next-piece)
        (cond-> (not (fits? board (cell-positions next-piece))) (assoc :status :lost)))))

(defn- try-fall [{:keys [board current] :as world}]
  (let [dropped (update current :row inc)]
    (if (fits? board (cell-positions dropped))
      (assoc world :current dropped)
      (lock-piece world))))

(defn- handle-input [world]
  (cond-> world
    (keyboard/is-key-pressed? (:left enums/keyboard-key))  (move-piece -1)
    (keyboard/is-key-pressed? (:right enums/keyboard-key)) (move-piece 1)
    (keyboard/is-key-pressed? (:up enums/keyboard-key))    rotate-piece))

(defn- tick [world dt]
  (if (not= :playing (:status world))
    world
    (let [world (handle-input world)
          fast? (keyboard/is-key-down? (:down enums/keyboard-key))
          timer (+ (:fall-timer world) (if fast? (* dt 8) dt))]
      (if (>= timer fall-interval)
        (-> world (assoc :fall-timer (- timer fall-interval)) try-fall)
        (assoc world :fall-timer timer)))))

(defn- draw-cell! [row col color]
  (shapes/draw-rectangle! (* col cell) (* row cell) (dec cell) (dec cell) color))

(defn- draw [{:keys [board current status score]}]
  (dotimes [r rows]
    (dotimes [c cols]
      (when-let [color (get-in board [r c])] (draw-cell! r c color))))
  (doseq [[r c] (cell-positions current) :when (not (neg? r))]
    (draw-cell! r c (piece-color (:kind current))))
  (text/draw-text! (str "score " (or score 0)) 10 (- height 24) 20 colors/raywhite)
  (when (= :lost status) (text/draw-text! "GAME OVER" (- (/ width 2) 90) (/ height 2) 30 colors/red)))

(defn -main [& _args]
  (game-loop/run-game!
   {:title      "Tetris"
    :width      width
    :height     height
    :init       init
    :tick       tick
    :draw       draw
    :background colors/black}))
Run It
From the repo root:
clojure -M:run -m phase-2.tetris-starter
Use arrow keys (Left/Right) to move the falling piece, Up to rotate it, and Down to accelerate its fall (soft-drop). Try to complete rows-when a row is completely filled, it disappears and you earn 100 points. The game ends when a new piece cannot spawn (the board is too full).
Hints
rotate-cw
Inside a 4×4 bounding box, a 90-degree clockwise rotation transforms each [row col] offset to [col, 3-row]. This is a fixed-size box rotation that works for all tetrominoes.
Example: the I-piece is originally [[1 0] [1 1] [1 2] [1 3]] (a horizontal line in the middle of the box). After rotation, it becomes [[0 2] [1 2] [2 2] [3 2]] (a vertical line at column 2).
If a rotation would move the piece out of bounds or into a filled cell, it will be rejected by the fits? check in rotate-piece, and the piece will stay in its current orientation. This is the "no wall-kick" behavior mentioned in the scope note.
fits?
A set of cell positions is valid if all of them pass these checks:
- Horizontal bounds:
0 <= col < cols(cols is 10). - Vertical bounds:
row < rows(rows is 20). Note: rows can be negative (during spawn), and those are always valid. - Occupancy: if and only if the row is non-negative, the cell at
[row col]in the board must benil(empty). Usenil? (get-in board [row col]).
Combine all three checks with and for each position, and every? across all positions.
clear-lines
When a piece locks, check which rows are completely full:
- A row is full if every cell (all 10 columns) is non-nil.
- Keep only the rows that have at least one
nilcell (i.e., remove the full rows). - Count how many rows were removed.
- Pad the board back to 20 rows by adding that many empty rows to the top (using
intoorconcat).
Return a map with :board (the new board) and :cleared (the count), since lock-piece uses both to update the score and check for game-over.
Discrete Falling and Locking
Unlike Space Invaders' continuous motion, Tetris pieces fall on a timer. Every 0.5 seconds (or faster if Down is held), try-fall is called. If the piece can move down one more row, it does. If not, it locks immediately. This is the state transition from "falling" to "locking" to "clearing" to "spawning."
Compare Against the Solution
Once you've got it working, read exercises/phase_2/tetris.clj to compare your implementation.
No Wall-Kicks in This Version
Real Tetris (SRS) has a wall-kick table: when a rotation would fail, it tries a short sequence of nudges, up to 1 cell horizontally for most pieces, up to 2 cells for the I-piece (which has its own kick table since its rotation axis differs from the 3×3 pieces), plus a small vertical nudge. Our version doesn't-a failed rotation is simply rejected. This simplifies the code while still teaching rotation and collision detection. If you're curious about wall-kicks, the SRS specification is a good follow-up research topic.
Score Calculation
Each cleared line is worth 100 points. Multiple lines cleared at once (a "tetris" or "T-spin") are worth the same: 100 per line. More complex scoring (bonus for T-spins or back-to-back clears) is left as an exercise.
Polyglot Corner
See this same design in other Clojure raylib bindings:
- Jolt + raylib-jlt:
raylib-jlt/src/net/b12n/raylib_jlt/tetris.clj, 10×20 well, 7 tetrominoes, rotation, line-clearing. The Jolt version includes level progression and gravity speedup, which this course's version omits in favor of simplicity.
Next: Lesson 6: Flappy Bird, the last lesson of Phase 2.
Lesson 6: Flappy Bird
Concepts
This lesson combines several core mechanics into a complete, polished arcade game and applies finite-state machines at the game-flow level: a different facet from Tetris's, which used one to drive gameplay phases within a single round:
- Infinite-Scroll Illusion: pipes scroll left continuously, but are regenerated off-screen to the right. The background always feels fresh because obstacles loop invisibly.
- Procedural Obstacle Generation: each pipe's gap height is random, making every game different. Spacing and spawning are deterministic; content is not.
- Single-Input Physics: gravity pulls the bird down every frame; a single input (Space) inverts velocity instantly. No sustained keys or complex controls-one button, physics-driven motion.
- Game-Flow State Machine: the game lives in one of three states:
:title(waiting to start),:playing(active gameplay), and:over(crashed, waiting to restart). Pressing Space in:overreturns to:title; a second Space press then starts a fresh game in:playing.
You'll implement the classic Flappy Bird game where you navigate through scrolling pipe gaps by tapping Space, with scoring for each pipe cleared.
Starter Code
Open exercises/phase_2/flappy_bird_starter.clj and fill in the three TODOs:
(ns phase-2.flappy-bird-starter
  "Phase 2, Lesson 6, Flappy Bird. Space flaps. Space also starts the
   game from the title screen and restarts it after game over, one key,
   three states."
  (:require [net.b12n.game-dev.engine.game-loop :as game-loop]
            [net.b12n.game-dev.engine.raylib.core.keyboard :as keyboard]
            [net.b12n.game-dev.engine.raylib.enums :as enums]
            [net.b12n.game-dev.engine.raylib.shapes.basic :as shapes]
            [net.b12n.game-dev.engine.raylib.text.drawing :as text]
            [net.b12n.game-dev.engine.raylib.colors :as colors]))

(def width 640)
(def height 480)
(def bird-x 120)
(def bird-radius 12)
(def gravity 900.0)
(def flap-vy -320.0)
(def pipe-w 60)
(def pipe-gap 140)
(def pipe-speed 180.0)
(def pipe-spacing 260) ;; horizontal distance between pipe spawns

(defn- new-pipe [x]
  {:x x :gap-y (+ 80 (rand-int (- height 160 pipe-gap))) :scored? false})

(defn init []
  {:status  :title ;; :title, :playing, :over
   :bird-y  (double (/ height 2))
   :bird-vy 0.0
   :pipes   [(new-pipe width) (new-pipe (+ width pipe-spacing))]
   :score   0})

(defn- flap-pressed? [] (keyboard/is-key-pressed? (:space enums/keyboard-key)))

(defn- physics [world dt]
  ;; TODO: apply gravity to `:bird-vy` each frame, override it with
  ;; `flap-vy` on a flap press, then integrate `:bird-y`.
  world)

(defn- move-pipes [{:keys [pipes score] :as world} dt]
  (let [moved     (mapv (fn [p] (update p :x - (* pipe-speed dt))) pipes)
        passed?   (fn [p] (and (not (:scored? p)) (< (+ (:x p) pipe-w) (- bird-x bird-radius))))
        score'    (+ score (count (filter passed? moved)))
        moved     (mapv (fn [p] (if (passed? p) (assoc p :scored? true) p)) moved)
        kept      (vec (remove (fn [p] (< (+ (:x p) pipe-w) 0)) moved))
        rightmost (apply max (map :x kept))
        kept      (if (< rightmost (- width pipe-spacing))
                    ;; TODO: spawn a new pipe once the rightmost one has
                    ;; scrolled far enough left (hint: pipe-spacing).
                    kept
                    kept)]
    (assoc world :pipes kept :score score')))

(defn- collides? [bird-y pipes]
  ;; TODO: bird-vs-floor/ceiling, plus bird-vs-each-pipe (the pipe gap
  ;; is centered on `gap-y` with total height `pipe-gap`).
  false)

(defn- tick [world dt]
  (case (:status world)
    :title (if (flap-pressed?) (assoc world :status :playing) world)
    :over  (if (flap-pressed?) (init) world)
    :playing
    (let [world (-> world (physics dt) (move-pipes dt))]
      (if (collides? (:bird-y world) (:pipes world))
        (assoc world :status :over)
        world))))

(defn- draw [{:keys [status bird-y pipes score]}]
  (doseq [{:keys [x gap-y]} pipes]
    (shapes/draw-rectangle! (int x) 0 pipe-w (int (- gap-y (/ pipe-gap 2))) colors/green)
    (shapes/draw-rectangle! (int x) (int (+ gap-y (/ pipe-gap 2))) pipe-w
                            (- height (int (+ gap-y (/ pipe-gap 2)))) colors/green))
  (shapes/draw-circle! bird-x (int bird-y) bird-radius colors/yellow)
  (text/draw-text! (str score) (- (/ width 2) 10) 20 30 colors/raywhite)
  (case status
    :title (text/draw-text! "SPACE to start" 210 240 20 colors/raywhite)
    :over  (text/draw-text! "GAME OVER, SPACE to retry" 140 240 20 colors/red)
    nil))

(defn -main [& _args]
  (game-loop/run-game!
   {:title      "Flappy Bird"
    :width      width
    :height     height
    :init       init
    :tick       tick
    :draw       draw
    :background colors/skyblue}))
Run It
From the repo root:
clojure -M:run -m phase-2.flappy-bird-starter
Press Space to start. Space is your only control-it instantly flaps the bird upward. Fly through the gaps in the pipes without hitting the top, bottom, or a pipe. Each pipe you pass counts as one point.
Hints
physics
- Gravity accelerates the bird downward:
vy' = vy + gravity * dt. - On a flap press, override velocity instantly:
vy'' = (if (flap-pressed?) flap-vy vy'). - Integrate position:
y' = y + vy'' * dt. - Return a world with
:bird-yand:bird-vyupdated.
move-pipes
- Pipes scroll left at
pipe-speedpixels per second. - A pipe is "passed" if it has not been scored yet AND its right edge is behind the bird's x position.
- Each passed pipe increments the score exactly once (the
:scored?flag prevents double-counting). - Pipes that scroll off the left edge are removed (their right edge
+ pipe-wis less than 0). - When the rightmost pipe has scrolled far enough left (more than
pipe-spacingpixels from the right edge), spawn a new pipe.
collides?
Collision occurs if:
- Bird hits top or bottom:
bird-y < bird-radiusorbird-y > height - bird-radius. - Bird hits a pipe: for each pipe, check if the bird's circle overlaps the pipe's rectangular gap. - The gap is centered on
gap-ywith half-heightpipe-gap / 2. - The bird (at positionbird-x) collides with the pipe if: - The bird's horizontal range[bird-x - bird-radius, bird-x + bird-radius]overlaps the pipe's horizontal range[x, x + pipe-w]. - AND the bird's vertical range[bird-y - bird-radius, bird-y + bird-radius]does NOT overlap the gap's vertical range[gap-y - pipe-gap/2, gap-y + pipe-gap/2].
State Machine
The game's three states are: - :title: show the start prompt, transition to :playing on Space. - :playing: run physics and collision; transition to :over on collision. - :over: show game-over, transition back to a fresh :title (via init) on Space. A second Space press then starts a new :playing game.
Notice that :title and :over don't run physics or collision: they're idle states waiting for input. Only :playing updates the world. The case statement in tick encodes this cleanly.
Compare Against the Solution
Once you've got it working, read exercises/phase_2/flappy_bird.clj to compare your implementation.
Score Increments Once Per Pipe, Not Continuously
You'll notice that the :scored? flag prevents the same pipe from incrementing score multiple times. Without this flag, the score would increase every frame the bird is inside the pipe's gap-clearly wrong. The flag is set to true the moment the bird passes the pipe, ensuring each pipe contributes exactly 1 point.
Procedural Pipe Generation
Every new pipe's gap height is random (within the range that keeps it on-screen). This makes the game replayable: the same code produces different challenges each time you play.
Closing Phase 2: The Arcade Classics Ladder
Over six lessons, you've built an entire arcade-game suite from scratch, each one teaching a distinct game-design pattern:
- Pong: Two-paddle physics and AABB collision (Lesson 1)
- Breakout: Grid-based block collision and a clear-the-board win condition (Lesson 2)
- Snake: Discrete grid movement, screen-edge wrapping, and self-collision on a growing body (Lesson 3)
- Space Invaders: Projectile management and direction-aware formation movement (Lesson 4)
- Tetris: Rotation in 2D, line-clearing state machine, and multi-step turns (Lesson 5)
- Flappy Bird: Infinite-scroll illusion, procedural generation, and three-state title/play/over flow (Lesson 6)
Each game reuses the same rendering and input engine, but encodes different game loops, physics models, and state machines. You now understand: - How to structure a game around explicit state machines. - How to detect collisions between different shapes (circles, rectangles, grids). - How to manage dynamic obstacle lists (bullets, pipes, falling blocks). - How to create the illusion of an infinite world by wrapping or regenerating off-screen. - How delta-time movement ensures consistent gameplay across frame rates.
Polyglot Corner
See this same design in other Clojure raylib bindings:
- Jolt + raylib-jlt:
raylib-jlt/src/net/b12n/raylib_jlt/flappy_bird.clj, flap through scrolling pipe gaps (SPACE).
Next: Phase 3: Three Lisps
Phase 3: Same Game, Three Lisps
You've built several games now, all on JVM Clojure. This lesson is about how JVM Clojure, Jolt, and jank each talk to the exact same C library (raylib) underneath, three genuinely different answers to one question: when a C function takes a small struct like Color or Vector2 "by value," how does a Lisp on top of it make that call at all?
The four-tier decision tree (Jolt's answer)
Jolt binds raylib with zero C shim code, by exploiting real facts about how your CPU's calling convention (ABI) passes small structs:
- Struct fits in one register, all-integer fields → pack it as an int. raylib's
Coloris 4 bytes,{r,g,b,a}as bytes, bit-identical to auint32_t. EveryColorargument is justr | g<<8 | b<<16 | a<<24, no native memory involved. - Struct too big for a register (>16 bytes on AArch64) → pass a pointer.
Camera2D/Camera3Dare 24/44 bytes, big enough that AArch64's own calling convention passes them indirectly (caller allocates, passes a pointer) even in C. Jolt just builds that struct in native memory and passes the pointer, this is AArch64-specific, not portable to x86-64 as-is. - Struct is a small float aggregate (≤16 bytes, e.g.
Vector2/Vector3) → neither trick above works (floats go in different registers than integers, and it's too small for the pointer trick). raylib ships a fallback API for exactly this,rlgl: scalar immediate-mode calls (rlVertex2f,rlColor4ub, ...) where every argument is a plain number. Functions likeDrawTriangle/DrawCubeget rebuilt out of these instead of called directly. - Struct comes back out by value → none of the three help.
LoadTexturereturns a 20-byteTexture2D, and on AArch64 anything over 16 bytes is returned indirectly: the caller allocates the result and passes its address inx8, a register reserved for exactly this. Chez'sforeign-procedurehas no spelling for "and here is the hidden result buffer inx8", so textures and framebuffers are reached through rlgl's scalar layer underneath raylib instead of through raylib's own texture API.
Read the four source pages for the full mechanics, each with real code: color-by-value.md, struct-by-value-pointer-trick.md, rlgl-immediate-mode.md, textures-via-rlgl.md.
...and then Jolt grew a fifth answer
Every tier above is a workaround for something jolt.ffi could not say. As of Jolt 0.7.23 it can say it: a binding may declare a parameter or a return type as [:by-value [:struct ...]] and Jolt handles the marshaling, including the x8 indirect return that tier 4 exists to dodge. raylib-jlt's six shader examples are built on it, because LoadShader returns a Shader by value and there was no other way to bind it at all:
;; src/net/b12n/raylib_jlt/raylib.clj -- a by-value struct RETURN
(ffi/defcfn ^:private load-shader-from-memory "LoadShaderFromMemory"
  [:pointer :string]
  [:by-value [:struct [[:id :uint] [:locs :pointer]]]])
So why read the four tiers at all? Two reasons, and they are the reason this lesson still leads with them:
- The shipped bindings still use them. The suite predates 0.7.23 and has not been rewritten onto the by-value API, so the code you will actually read in
raylib.cljis the four-tier code. Its own catalog says as much: the by-value support "supersedes the workarounds," and a page describing the new API "is not written yet." - The tricks are the transferable part.
[:by-value ...]is one FFI's feature. "A 4-byte all-integer struct travels in a register bit-identically to auint32" is a fact about your CPU, and it is still true in every language you will ever bind C from — including the ones whose FFI has no by-value support to grow.
The practical upshot if you go and write Jolt FFI code yourself today: reach for [:by-value [:struct ...]] first, and treat tiers 1-4 as what to do when you meet an FFI that cannot.
jank's different answer: the boundary is at the value, not the call
Jolt and JVM Clojure (what you've been using) both cross the FFI boundary at the call: marshaling happens per-call, but once a raylib value is on the Clojure side, it's an ordinary value: you can return it, hold it in an atom, pass it through loop/recur, whatever you'd do with any other Clojure value.
jank draws the line somewhere stricter: a native C++ value cannot implicitly cross a jank function boundary — not returned, not taken as a parameter, not carried through loop/recur. By default a native value is built and consumed within one let/call expression.
Two qualifications matter, and both are easy to over-read in either direction:
- It is about conversion, not about C++. A type with a conversion trait — integrals, bools, C strings,
std::string— crosses freely. It isColor,Vector2,Rectangle,Camera2Dthat have none. - There is a documented way out.
cpp/new+cpp/boxgives you an ordinary jank object you can return, put in a vector, or hold in an atom, andcpp/unboxgets the value back. The box has to be heap-allocated precisely because it outlives the scope that made it. So "cannot cross" means "cannot cross for free", not "cannot cross".
Even so, the rule shapes the code far more than a marshaling detail would: a closure counts as a fn boundary, so dotimes and doseq break where loop/recur works, and an accessor you would naturally factor into a defn cannot be. Read native-value-lifetimes.md for the six faces of that one rule, each with the committed example that proves it.
Same library, three philosophies
| Boundary | Portability | Shim code needed | |
|---|---|---|---|
JVM Clojure (coffi/Panama) | at the call | fully portable (JVM abstracts the ABI) | none |
Jolt (jolt.ffi) | at the call | the shipped bindings' pointer trick (tier 2) is AArch64-specific; [:by-value ...], since 0.7.23, is not | none |
| jank | at the value | portable — the constraint is jank's, not the ABI's | none, but the value-lifetime rule constrains how you write code, not just how it's bound |
None of these three need a hand-written C shim for raylib, that's notable on its own (contrast: b12n-tsj, a sibling project binding tree-sitter, needs a full C shim because its structs are both passed and returned by value at sizes none of these tricks cover).
Next
Port your Pong, read a real Jolt Pong side-by-side with the one you built, then attempt a jank port yourself.
Port Your Pong
Part 1, read the Jolt Pong side by side with yours
Open your own exercises/phase_2/pong.clj next to raylib-jlt's pong.clj (clone that repo if you want to run it: bb pong, same bb <name> pattern as the bouncing-ball demo from Phase 1's Polyglot Corner, and the same two prerequisites that page lists). You don't need to understand every line of Jolt syntax, answer these questions from reading, not from running:
- Does Jolt's Pong represent the world as one immutable value the way yours does, or does it lean on mutable state? (Hint: look for
set!or an atom vs. a value threaded through a loop.) - Where does Jolt's version touch a raylib struct that Phase 3's FFI lesson said needs one of the four ABI tricks, a
Colorargument to a draw call, or aVector2? You won't see a C shim anywhere; that's the point. - What's the AI paddle doing differently, if anything, from your tracking-AI implementation?
Part 2, there's no jank Pong. Build the first one.
b12n-raylib-jnk doesn't have a hand-built Pong: its 212 ports (of raylib's 220 official examples) are all direct ports of raylib's own C examples, not original games. You're not comparing against an answer key here; you're the first person to port this particular game to jank.
Don't do this inside b12n-gamedev-course: jank ports live in b12n-raylib-jnk itself, following that repo's own documented recipe: docs/guide/porting-workflow.md. Before writing any jank code, also read docs/guide/native-value-lifetimes.md (this phase's Lesson 1 already pointed you at it), Pong's ball position needs to survive across frames, which is exactly the case that rule constrains hardest. Start smaller than a full port: get a paddle and a ball drawn and moving before wiring up scoring. Use bb info in that repo to find existing shapes/input examples whose bindings you'll reuse (you don't need to write any new FFI bindings, every primitive Pong needs already exists somewhere in that repo's 212 ports).
This part of the lesson is intentionally open-ended, there's no solution file to compare against. If you get a paddle and ball moving in jank at all, you've done the hard part.
Next
Closing: Same Game, Three Philosophies
You've now seen one game (Pong) built three ways over the same C library. Before moving to Phase 4, write a short answer (a paragraph is plenty) to each of these, there's no single correct answer, the point is noticing the trade-offs for yourself:
- Which FFI philosophy would you want if you were building a much bigger game, hundreds of entities, complex structs? (A good answer touches on: does "boundary at the call" or "boundary at the value" make it easier to hold onto lots of game objects across frames?)
- Which one would you want if you were optimizing for raw performance, no JVM/GC overhead at all? (A good answer notices that both Jolt and jank are JVM-free, the real performance question is between those two and JVM Clojure, not between Jolt and jank.)
- Which one would you want if you were teaching a total beginner their very first Lisp? (A good answer weighs "boring, portable, huge ecosystem" against "get closer to the metal from day one.")
- Now that you've seen jank's stricter value-lifetime rule up close - did it change how you thought about the Pong port, even before you wrote a line of code? (A good answer notices that a constraint on where a value can live is a constraint on program shape, not just syntax.)
Where this goes next
Every dialect in this course binds the exact same raylib C library three different ways, for three different trade-offs, and none of them needed a hand-written C shim to do it. That's not an accident of raylib being simple; it's a real design space every FFI author navigates. If this was the most interesting part of the course for you, Bob Nystrom's Game Programming Patterns is the architecture half — and for the FFI half, both sibling suites keep docs/guide/ directories worth reading end to end, not just the pages this phase links. The ones this lesson never had room for:
raylib-jlt — kwarg-drawing-api.md (how a raw C surface gets an ergonomic Clojure one on top), and headless-smoke-testing.md (how you test a thing whose whole job is to open a window).
b12n-raylib-jnk — cpp-interop-toolbox.md (the cpp/ surface, one entry per tool), type-checking-and-coercion.md and numeric-performance.md (what a native-compiled Clojure actually costs you per number), and jvm-surface-gaps.md (what a JVM-Clojure habit finds missing, which is the honest counterpart to everything Phase 3 sold you on).
Both suites are still moving, so treat any count in this phase as a snapshot: their own example-catalog.md is the live number.
Next
Phase 4, Lesson 1: Fixed Timestep
The Limitation We Flagged Back in Pong
Back in Phase 2's Pong lesson, move-ball did something that came with a warning attached:
You'll notice that the ball's
dxanddyvelocities are not scaled bydt: the ball moves by raw pixel amounts each frame (dxpixels per frame,dypixels per frame), not time-scaled. This is a deliberate simplification for this lesson: it only looks correct at a fixed target frame rate (here, 60 FPS). Real games scale velocity bydt, like the bouncing-ball demo in Phase 1, Lesson 2. This is a limitation of the current approach: frame-rate-dependent gameplay is fragile. Phase 4's "fixed timestep" lesson exists specifically to solve this problem properly.
This is that lesson. Here's the problem in full, and the tool that solves it.
Two Ways to Handle Time, Both With Problems
Variable dt (what run-game! has done since Phase 1): every frame, tick gets called once with whatever dt the frame actually took. This is what the bouncing-ball demo does, scale movement by dt and speed is consistent across machines. It's a real fix for Pong's raw-pixel-per-frame problem... but it introduces a subtler one: your simulation is no longer deterministic. Run the same game twice with slightly different frame timings (a dropped frame here, a GC pause there) and you get slightly different physics each time, because every tick call integrates over a different, real-world-measured dt. For a two-paddle Pong that's invisible. For anything with more delicate physics, stacked objects, replay systems, networked games that need both players' simulations to agree, it's a real problem.
Fixed dt, naively: call tick with the same constant dt every frame, no matter how long the frame actually took. Now the simulation is deterministic, same inputs, same dt, same result, every time. But now you've reintroduced Pong's original bug at a different layer: if a frame takes longer to render than your fixed dt assumes (window resize, OS hiccup, alt-tab), the game just falls behind real time and never catches up. Worse, imagine you try to fix falling-behind by calling tick extra times to "catch up" whenever a frame runs long, each catch-up tick costs real CPU time, which makes the next frame even later, which demands more catch-up ticks next time. This runaway feedback loop has a name: the spiral of death. A single bad frame turns into a permanently unplayable game.
The Accumulator Pattern
The classic fix (dating back to Glenn Fiedler's "Fix Your Timestep!") is to decouple simulation time from render time using an accumulator:
- Each frame, add the real elapsed time to a running
accumulator. - While the accumulator holds at least one whole
fixed-dtchunk, calltickwith exactlyfixed-dtand subtractfixed-dtfrom the accumulator. This can run zero, one, or several times per frame, depending on how much real time has piled up. - Cap the number of catch-up steps per frame (
max-steps), if the accumulator has enough backlog to justify 1000 steps, only run a handful and let the rest wait for future frames. This trades "instantly caught up" for "bounded work per frame," which is the right trade as long asmax-steps * fixed-dtcomfortably exceeds your target frame time, a briefly-slow simulation then recovers gracefully over the frames that follow. Pick afixed-dttoo fine for that budget (more catch-up capacity than one frame's real time can supply) and the backlog grows every single frame instead, stall or no stall, see the callout after Worked Example 2. - Whatever fraction of
fixed-dtdidn't fit this frame carries over in the accumulator to next frame, no time is lost, it's just deferred.
This is exactly what step-fixed does:
(defn step-fixed
  "The classic fixed-timestep accumulator: given the world, a fixed dt,
   how much unspent simulation time carried over from last frame
   (accumulator), how much real time elapsed this frame, and a cap on
   steps per frame, calls tick once per whole fixed-dt chunk the
   accumulated time can afford, always with the SAME dt value every
   call. Returns [world' accumulator'], the accumulator is NOT
   clamped when the cap trips, so any leftover backlog carries into
   next frame's call in full, to be worked off over subsequent frames.

   `max-steps` guards against a 'spiral of death' AFTER A TRANSIENT
   STALL (each step takes real time to compute, so catching up too
   much in one frame can make the next frame even slower), but only
   when `max-steps * fixed-dt` comfortably exceeds your target frame
   time (e.g. `:fps 60` -> ~16.7ms; the default `max-steps` 5 covers
   fixed-dt down to ~3.3ms). Choose a fixed-dt/max-steps combination
   whose product stays above your target frame time under NORMAL
   (non-stalled) play, or the backlog this fn defers will grow every
   single frame instead of only after a stall, this fn has no way to
   tell those two cases apart from inside one call."
  [tick world accumulator elapsed fixed-dt max-steps]
  (loop [w world acc (+ accumulator elapsed) steps 0]
    (if (and (>= acc fixed-dt) (< steps max-steps))
      (recur (tick w fixed-dt) (- acc fixed-dt) (inc steps))
      [w acc])))
It's a pure function, no window, no timing calls, no side effects. Given a world, an accumulator, and how much time elapsed, it returns the new world and the new accumulator. run-game! is the only thing that calls it with real frame timings; you can call it yourself with made-up numbers to see exactly what it does, which is the point of the two worked examples below.
Worked Example 1: Splitting 25ms Into 10ms Chunks
(let [calls (atom [])
      tick  (fn [w dt] (swap! calls conj dt) (update w :n inc))
      [world' acc'] (game-loop/step-fixed tick {:n 0} 0.0 0.025 0.01 10)]
  (:n world')  ;=> 2      (25ms elapsed / 10ms fixed-dt = 2 whole steps)
  acc'         ;=> 0.005  (5ms of unspent time carries over)
  @calls)      ;=> [0.01 0.01]
Starting accumulator is 0.0, 0.025 seconds (25ms) elapsed this frame, fixed-dt is 0.01 (10ms), and up to 10 steps are allowed. step-fixed adds the elapsed time to the accumulator (0.0 + 0.025 = 0.025), then peels off whole 0.01-second chunks: first chunk brings the accumulator to 0.015, second chunk brings it to 0.005. At 0.005 there's not a full 0.01 left, so it stops. tick ran exactly twice, both times with dt = 0.01: never with the "wrong" 25ms, and never with an unpredictable third value. The leftover 0.005 isn't thrown away, it's still there in acc', waiting to combine with whatever elapses next frame.
Worked Example 2: The Cap Stops the Spiral
(let [tick (fn [w _dt] (update w :n inc))
      [world' _acc'] (game-loop/step-fixed tick {:n 0} 0.0 10.0 0.01 5)]
  (:n world'))  ;=> 5   (not 1000, even though 10s / 10ms = 1000 whole steps fit)
This is the spiral-of-death guard in action. 10.0 seconds elapsed, maybe the app was suspended, or a breakpoint sat mid-frame, and with a 10ms fixed step, that's a full 1000 catch-up steps' worth of backlog. Without a cap, step-fixed would try to run tick 1000 times in a single frame, which would itself take real time, delaying the next frame's get-frame-time, growing the backlog further, and so on, the spiral. With max-steps set to 5, it runs exactly 5 steps and stops, leaving 9.95 seconds still sitting in the accumulator to be worked off gradually over subsequent frames. The simulation falls behind after a stall, same as it would with no fixed timestep at all, but it recovers, instead of never recovering.
This only works because 5 * 10ms = 50ms per frame comfortably exceeds a 60fps frame's ~16.7ms. Once the stall is over, each ordinary frame drains more backlog (50ms worth) than it adds (16.7ms), so the debt shrinks every frame until it's gone, genuine recovery, not just a bounded lag. But swap fixed-dt for something finer, say 1ms, and the math flips: 5 * 1ms = 5ms per frame is now less than an ordinary frame's ~16.7ms, so the accumulator grows on every single frame, no stall required at all, just normal play with too fine a fixed-dt for the chosen max-steps. The cap still bounds how much compute happens in any one frame, which is the property that stops runaway CPU cost, but it can't, on its own, guarantee the backlog ever shrinks. That's on your choice of fixed-dt/max-steps-per-frame: keep their product above your target frame time under normal play, and the recovery story above holds; the two tests step-fixed-recovers-after-one-transient-stall and step-fixed-does-not-recover-under-a-sustained-fixed-dt-mismatch in game_loop_test.clj run both scenarios for real, if you want to see the difference executed rather than just argued.
Using It: run-game!'s Two New Optional Keys
run-game! calls step-fixed for you when you opt in, everything from Phases 1 through 3 keeps working exactly as before, because both new keys are optional and default to variable-dt behavior:
(game-loop/run-game!
 {:title    "Fixed-Step Demo"
  :width    640
  :height   480
  :fixed-dt (/ 1.0 60.0)   ; simulate at a fixed 60Hz, regardless of render fps
  :init     init
  :tick     tick            ; tick's dt argument is now always (/ 1.0 60.0)
  :draw     draw})
:fixed-dt: when supplied,tickis called zero or more times per frame viastep-fixed, always with this exactdtvalue, instead of once per frame with the frame's real (variable)dt. Omit it and nothing changes:run-game!callstickonce per frame with the real framedt, exactly like every exercise in Phases 1-3 already does.:max-steps-per-frame: the spiral-of-death cap from Worked Example 2. Only matters when:fixed-dtis set. Defaults to5.
draw still gets called exactly once per frame either way, step-fixed only changes how many times (and with what dt) simulation runs; rendering stays at the render loop's own cadence.
Go Try It
You now have the tool, go update your own Pong's move-ball (in exercises/phase_2/pong.clj) to use :fixed-dt instead of hardcoded per-frame pixel deltas. This is an optional, ungraded extension: Pong's exercise file belongs to Phase 2, not this lesson, so nothing here requires you to touch it. But if you want to see the fix-your-timestep pattern solve the exact problem it was foreshadowing, that's the place to try it.
Next
ECS, how real games organize entities as data instead of a class hierarchy.
Entity-Component-System
Not public yet. This page links to
b12n-herfi, which is still private, so those links will 404 for now. They're being opened up as the course progresses, and this note goes away when they are. The three raylib suites the rest of the course is built on (clj, jlt, jnk) are public today.
The problem this solves
Every game you've built so far represents each kind of thing (the ball, the paddle, an enemy, a pipe) as its own map shape, handled by its own bespoke code in tick. That works fine at Space Invaders' scale (one player, ~30 enemies, one bullet). It stops working once you have many different kinds of entities that still share some behavior, health, position, being drawable, because every new entity type means more special-cased branches everywhere.
The idea
Entities are just IDs. Components are plain data attached to an ID. Systems are functions that operate on every entity that has a particular combination of components. No inheritance hierarchy, no "an Enemy is-a GameObject", just data, and functions over data. If that sounds like "the way you were already thinking," that's the point: ECS is what naturally falls out once you already think in data + pure functions, which is exactly how every tick function in this course has been written.
A real, working example: herfi
b12n-herfi is a 3D multiplayer game prototype (Clojure backend, ClojureScript + Three.js frontend) with a real hand-rolled ECS under src/cljs/herfi/scene/ecs.cljs - forked from infinitelives/px3d, deliberately mimicking PlayCanvas's own ECS design. Clone it and read through that file (it's compact). Specifically look for:
- How is an entity represented, what's the actual "ID"?
- How is a component attached to an entity, what does the data shape look like?
- How does a system decide which entities it cares about, does it filter by which components an entity has, or something else?
herfiis multiplayer, itsscene/network.cljssyncs state over WebSocket. Skim it: does the ECS shape make that easier or harder than the ad hoc world-maps you've been building would?
Next
Particles, Object Pooling, and Easing/Math for Games
When a single space invader descends the screen, allocating a new bullet map and letting the old one become garbage is fine. When you're building a Vampire Survivors-style game with hundreds of projectiles firing every frame, that approach grinds to a halt: allocating thousands of objects per second and letting them become garbage, then waiting for the garbage collector to run, introduces stutters and frame hitches that ruin the feel.
This chapter covers two core patterns for performant game systems: object pooling for managing high-volume, short-lived game entities, and easing functions for making motion feel natural instead of mechanical.
Object Pooling: The Pattern
The Problem
In simple_particles.clj and particle_system.clj, each particle is represented as a map. In simple_particles.clj, when a particle expires (its :alive flag becomes false), it's filtered out of the particle vector, the garbage collector will eventually reclaim it. This works fine for a few dozen particles. But when hundreds of particles are live at once (capped at MAX-PARTICLES = 3000 total concurrent particles), emitting even a modest ~0.5 particles per frame (the default :emission-rate -2 behavior) means sustained allocation and garbage-collection pressure that causes stutters and frame hitches.
The solution is object pooling: instead of creating new particles, you allocate a fixed pool of particle slots at startup and reuse them.
The Data Shape
Looking at simple_particles.clj, each particle is a Clojure map:
{:pos {:x 100.0 :y 200.0}
 :vel {:x 1.5 :y -2.0}
 :radius 5.0
 :color {:r 0 :g 121 :b 241 :a 255}
 :type :water
 :lifetime 0.0
 :alive true}
A pooled implementation would pre-allocate a fixed-size vector of these maps, say, 3000 slots, where each slot is either: - nil (available for reuse) - A live particle map with :alive true
When you emit a particle, you scan for the first nil slot and claim it. When a particle dies (:alive becomes false), you don't remove it from the vector; you just set it back to nil. The vector never grows, and the garbage collector has almost nothing to do.
The 3D particle system in particle_system.clj uses a similar data shape for 3D particles:
{:position {:x 0.0 :y 0.0 :z 0.0}
 :velocity {:x 1.5 :y 5.0 :z -0.5}
 :lifetime 3.0
 :age 0.0
 :size 0.075
 :hue 45.0}
Again, a pooled version would pre-allocate a fixed vector of these maps and reuse slots, replacing :alive logic with a simple :age >= :lifetime check to determine whether a slot is live or dead.
Why Pool?
- Allocation pressure: Creating thousands of maps per second stresses the memory allocator and garbage collector.
- GC pauses: Stop-the-world garbage collection pauses can cause visible frame hitches when the heap is under pressure.
- Predictable memory: A fixed pool uses a known amount of memory, no surprises when load spikes.
- Cache locality: Pooled arrays have better CPU cache behavior than scattered garbage-collected objects.
For games targeting 60 fps with tight frame budgets, pooling is not optional.
Vectors and Easing: Making Motion Feel Natural
Linear interpolation is mechanically correct: if you move an object from A to B over 120 frames, updating its position by (B - A) / 120 each frame gets you there on time. But it feels robotic, the motion has no character.
Easing functions solve this by transforming frame time into position in a non-linear way. A classic example: an object accelerates at the start of its motion, then decelerates at the end, just like a bouncing ball or a door slamming shut. No real physics needed, just the right curve.
Easing in Practice
easings_ball.clj demonstrates the concept with three animated properties:
- Position with elastic easing: the ball bounces into place, overshooting and settling.
- Radius with elastic easing: the ball swells, bouncing as it grows.
- Alpha (opacity) with cubic easing: the ball fades out smoothly.
Each animation spans a number of frames (e.g., 120 for position, 200 for radius). The easing function takes the current frame number and returns a value between the start and end, but not linearly. Here's ease-elastic-out:
(defn ease-elastic-out
  "Elastic easing out"
  [t b c d]
  (let [t (/ t d)]
    (if (== t 0.0) b
        (if (== t 1.0) (+ b c)
            (let [p (* d 0.3)
                  s (/ p 4.0)]
              (+ (* c (Math/pow 2.0 (* -10.0 t))
                    (Math/sin (/ (* (- t s) 2.0 Math/PI) p)))
                 c b))))))
The parameters are: - t: current elapsed time (frame number) - b: beginning value (start position, e.g., -100) - c: change (end - begin, e.g., 500) - d: duration in frames (e.g., 120)
As t goes from 0 to 120, the function returns values from -100 to 400, but with a curve that overshoots slightly and bounces back, creating a snappy, lively feel instead of a mechanical ramp.
A Grid of Easing Curves
raylib-jlt's easings.clj shows 12 different easing functions in a 3×4 grid, each animating a ball ping-ponging left and right across a track. Each curve has a different character:
- linear: constant speed, mechanical
- inQuad / outQuad: slow-then-fast or fast-then-slow
- inOutCubic: slow-fast-slow, like a pendulum
- inSine / outSine: smooth, like a sine wave
- inExpo: explosive acceleration
- outBounce: bouncing, settling motion
- inBack: overshoot at the start
- inOutQuart: strong acceleration/deceleration
The lesson: the shape of the easing curve determines the feel of the motion. A cubic curve feels snappier than a sine curve. An elastic curve feels playful. Choosing the right curve is as much about game feel as it is about math.
The Linear Alternative
Compare easing to raw linear interpolation:
;; Linear (mechanical)
(let [progress (/ current-frame duration)
      value (+ start (* progress (- end start)))]
  value)

;; Eased (lively)
(ease-cubic-out current-frame start (- end start) duration)
The linear version is simpler and cheaper. Use it for background animations or objects the player never focuses on. Use easing for player-controlled characters, UI interactions, and anything the eye tracks.
Next lesson: Procedural Generation and AI
Procedural Generation, Simple AI & Testing a Game
Not public yet. This page links to
b12n-ohuntley, which is still private, so those links will 404 for now. They're being opened up as the course progresses, and this note goes away when they are. The three raylib suites the rest of the course is built on (clj, jlt, jnk) are public today.
After building the game loop and rendering pipeline, we turn to the systems that make a game feel alive: procedurally generated content that's different every playthrough, AI agents that create challenge and presence, and the testing discipline that ensures both work correctly.
Procedural Generation: Building Solvable Mazes
A procedurally generated maze is different every time the game starts, but it must always be solvable-otherwise the player can't win. How do you guarantee that?
Compare two implementations:
Simple maze generation (raylib-clj's games/retro_maze_3d.clj): Uses recursive backtracking, a classic maze generation algorithm. Start at the top-left corner, carve a passage to a random unvisited neighbor, and repeat. When you reach a dead end (no unvisited neighbors), backtrack to the last cell that had choices, and try again. The algorithm terminates when every cell has been visited exactly once.
(defn generate-maze [w h]
  (let [start-x 0
        start-y 0
        grid (-> (make-grid w h)
                 (assoc-in [start-y start-x :visited] true))]
    (generate-maze-step grid [[start-x start-y]])))
The result: a perfect maze (every cell reachable from every other, no loops) where there is always a path from start to any goal.
Larger implementation (b12n-ohuntley's src/ohuntley/maze.cljc): Uses the same recursive backtracking algorithm, but adds one critical piece: after carving, it finds the furthest cell from the start using breadth-first search and makes that the exit. This is deterministic, it always picks the cell that requires the longest path to reach, maximizing the player's challenge.
(defn find-furthest-cell
  "Find the cell furthest from start using BFS."
  [grid width height start-x start-y]
  ;; BFS that walks only through passages (no walls)
  ;; Returns the cell with the maximum distance
  ...)

(defn generate-maze [width height seed]
  (let [random-fn (create-random seed)
        grid (create-grid width height)
        carved-grid (carve-passages grid width height random-fn 0 0)
        exit (find-furthest-cell carved-grid width height 0 0)]
    ...))
Your Turn: The Solvability Question
Read both implementations to understand how they work: - In retro_maze_3d.clj (lines 88-107), trace through generate-maze-step. What happens when a cell has no unvisited neighbors? What does the algorithm guarantee about cell connectivity? - In ohuntley/maze.cljc (lines 117-149), examine carve-passages. Does it visit every cell? Does it guarantee connectivity? Then look at find-furthest-cell (lines 155-190): what does it do, and does it affect whether a path to the exit exists?
Work through a small example on paper: a 3x3 or 4x4 grid, to trace the algorithm step by step. Watch the stack grow and shrink. Watch walls get removed.
Then answer: What has to be true of a randomly generated maze for it to be solvable, and where in the generation code does that get guaranteed? (Or does the code not guarantee it? If so, what's missing?)
Simple AI: Two Shapes of Emergent Behavior
There are many ways to write an AI agent. Two common approaches appear across this course's examples:
Emergent behavior from local rules (raylib-jlt's boids.clj): About 70 agents, each running three simple calculations every frame: 1. Cohesion: "Move toward the average position of nearby agents" 2. Alignment: "Match the average velocity of nearby agents" 3. Separation: "Move away from nearby agents to avoid crowding"
No state machine. No named behaviors. Just three weighted forces applied to each agent every frame. Yet the flock patterns that emerge-starling-like murmurations, flowing around obstacles, splitting and rejoining-look lifelike and coordinated.
(defn step-boid [b boids]
  (let [near (near-boids b boids)
        ;; Cohesion: toward average position
        ;; Alignment: match average velocity
        ;; Separation: repel from neighbors
        vx (+ (:vx b)
              (* 0.0008 (- ax (:x b)))        ;; cohesion
              (* 0.05 (- avx (:vx b)))        ;; alignment
              (* 0.0010 sx))                   ;; separation
        vy (+ (:vy b) ...)])
    ;; Update position
    {:x (mod (+ (:x b) vx) width) ...}))
Explicit state machines (b12n-ohuntley's src/ohuntley/entities/zombie.cljc): Each zombie is in exactly one of four states: - Patrol: Follow waypoints around the maze - Chase: Pursue the player (if they can be seen via line-of-sight) - Returning: Go back to the patrol waypoint after the player is lost - Frozen: Temporary immobilization from a power-up
Each state has explicit transitions: patrol sees the player → chase; chase doesn't see the player for N frames → returning; returning reaches the waypoint → patrol. The behavior is clear and debuggable: you can print the zombie's current state and know exactly what it's doing.
(defn update-patrol [zombie delta maze player]
  (cond
    ;; Detect player -> transition to chase
    (and player (can-see-player? maze zombie player))
    (start-chase ...)

    ;; Path done -> advance waypoint
    (nil? (:current-path zombie))
    (advance-waypoint ...)

    ;; Keep moving
    :else
    (move-along-path ...)))
The Core Difference
Both produce "simple AI"-neither runs pathfinding every frame or evaluates complex heuristics. But they represent opposite design philosophies:
- Boids (emergent): Minimal state, behavior arises from rules, harder to debug, easier to scale to hundreds of agents
- Zombies (state machine): Maximal clarity, each state clearly means something, easier to add special cases, requires more code per agent
Neither is "better"; they're different shapes of simplicity. Emergent AI shines when you want lifelike swarms or flocks. State machines excel for characters with clear roles and understandable personality.
Testing a Game
How do you test gameplay? The naive approach-"automate a player running through the game"-doesn't work because you'd need to script every possible playthrough, every random event, every corner case.
The practical answer: Test the logic, smoke-test the shell.
b12n-ohuntley's test suite (58 tests, 455 assertions) is split into five modules, each testing a pure-logic system:
| Module | Tests | Assertions | What It Tests |
|---|---|---|---|
| Maze | 10 | 251 | Maze generation, pathfinding, reachability |
| Pathfinding | 12 | - | A* pathfinding correctness |
| Zombie AI | 15 | - | State transitions, line-of-sight, pursuit logic |
| Combat | 9 | - | Damage calculation, effect application |
| Game state | 12 | - | Level progression, win/loss conditions |
Notice what's not tested in detail: the 3D rendering, the input handling, the audio playback. Those subsystems are smoke-tested-"does the game window open, accept input, and run without crashing"-but not unit-tested frame by frame. The cost would be astronomical, and the return would be low; rendering bugs are usually caught by visual inspection, not assertions.
This course's own game-loop engine (its core run-game! built back in Phase 1, extended with step-fixed here in Phase 4) follows the same pattern: pure logic functions are tested directly (your tick functions, your collision checks, your game-state updates), while the windowed shell (run-game!) is only tested to confirm it starts and stops without panicking.
The insight: Test the systems that matter, skip the systems that are obvious. Maze generation could be wrong in subtle ways (generates unsolvable mazes, or mazes that are too easy). Zombie behavior could break on edge cases (what if the player freezes the zombie in mid-chase?). Game state could corrupt (what if the player wins and loses simultaneously?). Those all deserve tests. But whether your 3D camera rotates smoothly or your skybox renders in the right order-you'll see that when you play it.
What's Next
You've now built the core systems that separate "interactive simulation" from "game": - Earlier in Phase 4: Fixed timestep, component-based architecture (ECS), particles and object pooling - This lesson: Procedural content, agent behavior, and testing discipline
Phase 5 brings it together: you'll build a complete, playable game from scratch, integrating the systems you've learned into one cohesive experience. No scaffolding, no handholding-just the skills you've developed and the freedom to design.
Capstone: Ship a Mobile Game
Not public yet. This page links to
b12n-rogue-shooter,b12n-crystal-balland theb12n-wikispages they link to, which are still private, so those links will 404 for now. They're being opened up as the course progresses, and this note goes away when they are. The three raylib suites the rest of the course is built on (clj, jlt, jnk) are public today.
Before you start: this setup is heavier than everything else in this course
Every exercise so far has run on the JDK + Babashka setup from Phase 0. This capstone runs on ClojureDart + Flutter + the Flame game engine: a materially bigger toolchain (a Flutter SDK install, an iOS/Android/macOS build target, and ClojureDart's own compiler). Budget real setup time before you expect to see a window. Follow b12n-rogue-shooter's own README for the actual install steps, they're specific to that toolchain and would go stale fast if duplicated here.
Step 1, Rogue Shooter (start here, not Crystal Ball)
b12n-rogue-shooter is a scrolling shooter with no shaders, a gentler on-ramp than Crystal Ball. Read these, in order, once it's running on your machine:
sprite-animation-cljd.md, sprite sheets,^:async onLoad, and a real crash trap worth knowing before you hit it yourself: an untyped#dart [...]literal compiles fine and crashes at runtime against a typed Dart setter.timer-component-cljd.md, spawn/fire timing, two shapes ofTimerComponent.batching-and-perf-cljd.md, draw-call batching (HasAutoBatchedChildren) and a live perf HUD (HasPerformanceTracker,FpsTextComponent), a different performance technique from Phase 4's object pooling (that cuts allocations and GC pauses; this cuts GPU draw calls), but the same underlying motivation: hundreds of entities at mobile-game scale hurts performance.
Then extend it: add a new enemy type, a power-up, or a second weapon. You don't need to build something original from scratch for this capstone, modifying a real, already-shipped game is the point.
Step 2, Crystal Ball (once Rogue Shooter feels comfortable)
b12n-crystal-ball adds one new thing on top of everything Rogue Shooter taught: a real GLSL fragment-shader pipeline (four shaders: firefly sparkle, fog, water reflection, ball glow). Read its index.md for the full page list, shaders are graphics-programming territory this course hasn't touched anywhere else, so go in expecting genuinely new material, not a repeat of Rogue Shooter's patterns.
Next
Once you've shipped something here (even a small extension), you can call it done, Where to go next has pointers for continuing past this course. Or keep going: Ship a Web Game is the fastest of the three capstones if you want another one under your belt, and Go Deep is there whenever multiplayer, 3D, or real test coverage at scale is what pulls you.
Capstone: Ship a Web Game
Not public yet. This page links to
b12n-cljsapp, which is still private, so those links will 404 for now. They're being opened up as the course progresses, and this note goes away when they are. The three raylib suites the rest of the course is built on (clj, jlt, jnk) are public today.
This is the fastest capstone to a shareable result, no native toolchain at all, and b12n-cljsapp provides a reference implementation with nine finished games you can fork and remix.
Two ways in
Remix an existing game. b12n-cljsapp's src/cljs/net/b12n/cljsapp/games/ has nine finished games, Memory, Breakout, Tetris, Snake, 2048, Connect Four, Wordle, Galaga, Asteroids, plus a dashboard. Fork the repo, pick one, and change something real: a difficulty curve, a new power-up, a visual theme, an entirely different win condition.
Build a tenth. See Track B for the exact two touchpoints (a display-name entry and a page-dispatch entry in main.cljs) a new game needs to show up in the dashboard.
Ship it
Fork b12n-cljsapp, push to your own GitHub repo, then under Settings → Pages, set Source to "Deploy from a branch" and pick main / public. This is the simplest path to a public URL for your game, no custom Actions workflow required. You'll have a shareable link the same day.
(b12n-cljsapp itself uses a custom Actions-based deploy for faster iteration; that's a more involved setup worth reading once the simple Settings → Pages path feels limiting, not a prerequisite to shipping your first fork.)
Next
Go deep, or if a shipped web game is your finish line for this course, Where to go next.
Capstone: Go Deep
Not public yet. This page links to
b12n-herfiandb12n-ohuntley, which are still private, so those links will 404 for now. They're being opened up as the course progresses, and this note goes away when they are. The three raylib suites the rest of the course is built on (clj, jlt, jnk) are public today.
Both of these are real, already-shipped codebases well past what this course teaches directly. The goal here isn't to finish them, it's to read production-scale game code and, if something grabs you, extend it.
Multiplayer & 3D: herfi
b12n-herfi, the ECS you read in Phase 4, plus real WebSocket multiplayer (scene/network.cljs) and Three.js 3D rendering, with a Clojure/Aleph backend. If Phase 3's FFI-philosophy question ("what would you want for a much bigger game?") stuck with you, this is what "bigger" actually looks like in this ecosystem.
Single-player 3D, AI, and real test coverage: ohuntley
b12n-ohuntley, the procedural maze generation and zombie-AI state machine from Phase 4, in full: 3D rendering via Three.js, five power-up types, particle effects, procedural sound, and, worth studying on its own, 58 tests / 455 assertions across maze/pathfinding/AI/combat/game-state. If you want to see what "test your game's pure logic thoroughly" looks like at real scale, this is the reference.
Next
Where to go next, this course's own guided material ends here.
Track B: Web Games
Not public yet. This page links to
b12n-cljsapp, which is still private, so those links will 404 for now. They're being opened up as the course progresses, and this note goes away when they are. The three raylib suites the rest of the course is built on (clj, jlt, jnk) are public today.
A standing remix playground. Jump in anytime after Phase 1, it's independent of the Phase 2-5 spine, needs no compile step (Scittle runs the .cljs straight in the browser, npx josh below is just a tiny local dev server, not a build), and if you want a fun detour between phases, this is it.
What's here
b12n-cljsapp's nine finished games, live at https://burinc.github.io/b12n-cljsapp/, Memory, Breakout, Tetris, Snake, 2048, Connect Four, Wordle, Galaga, Asteroids - plus a dashboard tying them together. Every one is ClojureScript.
Run it locally
git clone git@github.com:burinc/b12n-cljsapp.git
cd b12n-cljsapp
npx josh public   # http://localhost:8000, live-reloads on save
Add a tenth game
Every game lives at src/cljs/net/b12n/cljsapp/games/<name>.cljs and exposes a page function taking the app's state atom. Two places register it into the dashboard, both in src/cljs/net/b12n/cljsapp/main.cljs:
- A display-name entry (e.g.
:memory-game "🧠 Memory Game"). - A dispatch entry mapping that same keyword to your game's
pagecall (e.g.:memory-game [memory/page state]).
Read games/memory_game.cljs first, it's one of the simpler ones, to see the actual page function shape before writing your own.
Next
Back to the main spine: Phase 2: Arcade Classics if you haven't started it yet, or Phase 5 if you have.